
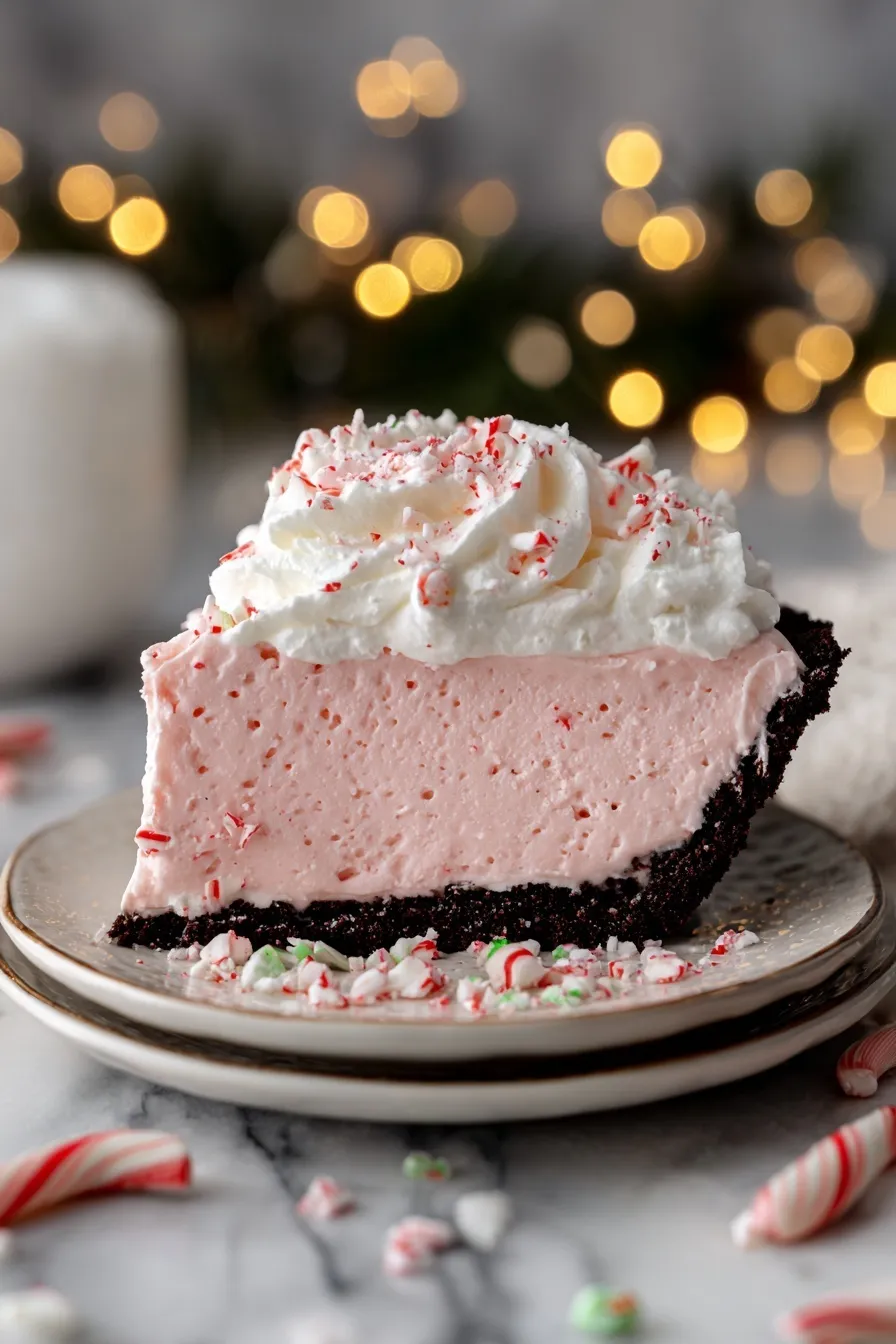
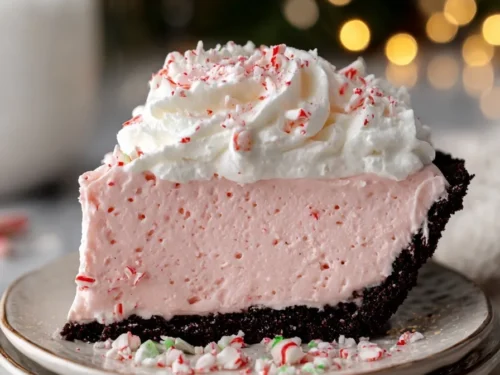
Holiday desserts don’t have to mean hours of baking and complicated techniques. This Christmas peppermint pie recipe combines creamy peppermint filling with chocolate cookie crust and candy cane topping—no oven required. Refreshing, festive, and perfect when you need impressive dessert without the stress.
Why This Christmas Peppermint Pie Recipe Works
Ever notice how the best holiday desserts balance rich and refreshing flavors perfectly? This easy peppermint pie recipe creates that contrast using simple no-bake techniques.
The magic happens when whipped cream lightens cream cheese into fluffy mousse-like texture. You’re getting bakery-quality results without turning on your oven—just mix, chill, and serve this stunning dessert that cuts through heavy holiday meals beautifully.
Here’s what makes this recipe foolproof:
- No-bake simplicity means no oven space needed during busy holiday cooking marathons
- Chocolate cookie crust provides rich contrast to cool, refreshing peppermint filling
- Make-ahead friendly since it needs 4+ hours chilling anyway—perfect for planning ahead
- Whipped cream creates airiness that makes every bite light instead of heavy like cheesecake
Ingredients
Ready to make holiday dessert that looks professional without complicated baking? This best Christmas peppermint pie uses ingredients you can grab at any grocery store.
For the chocolate crust:
- 1½ cups finely crushed chocolate sandwich cookies (18-20 cookies, filling included)
- 6 tablespoons unsalted butter, melted
For the peppermint filling:
- 8 oz full-fat cream cheese, softened to room temperature
- ¾ cup powdered sugar, sifted
- 1 teaspoon pure peppermint extract
- 2 drops red or pink gel food coloring (optional)
- 1½ cups heavy cream, very cold
For the topping:
- ½ cup crushed candy canes (4-5 standard canes)
- Additional whipped cream (optional)
- Fresh mint sprigs (optional)
The combination of chocolate and peppermint is classic for good reason—the flavors complement each other beautifully. Using sandwich cookies with filling included creates richer crust than plain chocolate wafers.
Step-by-Step Instructions
1. Crush cookies finely using a food processor or place in a zip-top bag and crush with rolling pin. You need exactly 1½ cups of fine crumbs—larger chunks make the crust crumble when slicing.
2. Melt butter in a microwave-safe bowl in 15-second intervals until completely liquid. Pour over cookie crumbs and mix thoroughly with a spatula until all crumbs are moistened evenly.
3. Press into pie plate by transferring mixture to a 9-inch pie dish and pressing firmly across bottom and up sides. Use the bottom of a glass to pack it tightly. Refrigerate for 30 minutes to set.
4. Beat cream cheese in a large bowl with an electric mixer on medium speed for 2-3 minutes until completely smooth. Scrape bowl sides frequently to ensure no lumps remain.
5. Add sugar and extract by mixing in sifted powdered sugar and beating until fluffy. Add peppermint extract and optional food coloring. Mix just until combined—don’t overbeat at this stage.
6. Whip heavy cream in a separate cold bowl with clean beaters until stiff peaks form. This takes 3-5 minutes on medium-high speed. Stop when peaks stand straight up when beaters are lifted.
7. Fold together gently by adding one-third of whipped cream to cream cheese mixture and folding to lighten. Add remaining whipped cream and fold very gently with a spatula until no streaks remain.
8. Fill the crust by spooning peppermint mixture into chilled chocolate crust and spreading evenly. The filling should be light and airy—don’t press it down or deflate the mixture.
9. Chill for minimum 4 hours or ideally overnight covered loosely with plastic wrap. Don’t let plastic touch the filling surface. This chilling time is non-negotiable for proper setting and clean slices.
10. Garnish before serving by sprinkling crushed candy canes over the top just before cutting. Add optional whipped cream swirls and mint sprigs for extra festive presentation.
Essential Equipment
9-Inch Pie Plate
Glass or ceramic pie plates chill evenly and look beautiful for serving. The standard 9-inch size provides perfect depth for this filling without being too shallow or too deep.
Electric Mixer (Hand or Stand)
Beating cream cheese until completely smooth and whipping cream to stiff peaks requires sustained mixing power. Hand mixers work perfectly—you don’t need expensive stand mixers for this recipe.
Food Processor for Crushing
Processing cookies creates fine, uniform crumbs for stable crust texture. You can use a rolling pin and bag method, but a food processor is faster and more consistent.
Wire Cooling Rack (PREMIUM)
Although this is no-bake, a rack keeps your work surface organized and protected. It’s also perfect for cooling the butter-cookie mixture slightly before pressing into the pan.
What to Serve With Christmas Peppermint Pie
Want to turn this easy Christmas pie into a complete holiday dessert experience? These pairings complement the cool, minty flavors beautifully.
Hot chocolate or peppermint mocha provides warm contrast to cold, refreshing pie. The temperature difference makes every bite more enjoyable and feels extra festive together.
Strong black coffee cuts through the sweetness and richness perfectly. The bitter notes balance creamy filling and make this dessert more sophisticated for adult gatherings.
Fresh berries on the side add color and tart contrast to sweet peppermint. Raspberries or strawberries look beautiful and provide refreshing palate cleanser between bites.
Sugar cookies or gingerbread create a complete dessert spread for holiday parties. The variety of textures and flavors makes your dessert table look abundant and impressive.
Storage and Reheating Guide
Refrigerator storage
Store covered pie in the refrigerator for up to 3-4 days after making. Keep plastic wrap loose to avoid crushing candy cane topping. The flavors actually deepen after a day in the fridge.
Freezer storage
Freeze whole pie or individual slices wrapped tightly in plastic wrap then foil for up to 1 month. Thaw overnight in refrigerator before serving. Add fresh candy cane topping after thawing for best crunch.
Serving instructions
Serve pie cold straight from the refrigerator for best texture and flavor. Let sit at room temperature for 5 minutes before slicing for cleaner cuts. Dip knife in hot water between slices for neat presentation.
Christmas Peppermint Pie Recipe Variations
Ready to customize this best peppermint pie recipe? These simple swaps create completely different flavor profiles using the same easy technique.
Chocolate peppermint bark version folds ½ cup mini chocolate chips into the filling before spreading in crust. The chocolate chunks create texture like peppermint bark candy. Drizzle melted dark chocolate over top instead of candy canes.
Graham cracker crust replaces chocolate cookies with 1½ cups graham cracker crumbs mixed with 6 tablespoons melted butter. The sweeter, lighter crust lets peppermint flavor shine even more. Perfect for those who prefer less chocolate.
Boozy adult version adds 2 tablespoons crème de menthe liqueur to the filling for sophisticated flavor. Reduce peppermint extract to ½ teaspoon to avoid overwhelming mint taste. Not suitable for kids but perfect for adult holiday parties.
Pro Tips & Tricks
Want this easy Christmas peppermint pie to turn out bakery-perfect every time? These techniques make all the difference.
Soften cream cheese completely by leaving at room temperature for 60 minutes before mixing—cold cream cheese creates lumps no amount of beating fixes.
Chill mixing bowl and beaters in the freezer for 10 minutes before whipping cream for faster, more stable peaks.
Don’t overwhip the cream because it quickly turns grainy or even into butter—stop immediately when peaks stand straight up.
Fold very gently when combining whipped cream with cream cheese to preserve airiness that makes this pie light instead of dense.
Press crust firmly using the bottom of a glass so it holds together when slicing instead of crumbling apart.
Wait until serving to add candy canes so they stay crispy instead of dissolving into the filling from moisture.
Frequently Asked Questions
Can you make Christmas peppermint pie recipe ahead?
Yes! Actually, this pie tastes better when made a day ahead because flavors meld together. The filling needs minimum 4 hours to set anyway, so making it the day before is perfect timing for holiday meal planning.
What if you don’t have peppermint extract?
Pure peppermint extract is essential for authentic flavor—don’t substitute spearmint or mint extract which taste completely different. If you can’t find it, crush extra candy canes finely and fold into filling for peppermint flavor.
Can you use light cream cheese?
Full-fat cream cheese works best for rich, stable texture that holds up during chilling. Light cream cheese can make the filling too soft and affect setting. Stick with full-fat for best results.
Why is my filling runny instead of set?
The pie needs minimum 4 hours chilling time, ideally overnight, to set properly. If it’s still soft after chilling, the cream wasn’t whipped to stiff enough peaks or wasn’t folded in gently enough.
How do you prevent candy canes from getting sticky?
Store crushed candy canes in an airtight container with a silica gel packet if your kitchen is humid. Add them just before serving rather than hours in advance so they stay crispy and crunchy.
Can you make this dairy-free?
Yes! Use dairy-free cream cheese and coconut cream (chilled overnight) whipped in place of heavy cream. The texture will be slightly different but still delicious. Make sure all ingredients are certified dairy-free.
Why You’ll Love This Recipe
Ready to simplify holiday dessert without sacrificing that wow factor? This Christmas peppermint pie delivers stunning presentation and refreshing flavor with zero baking stress.
You’ll love how it cuts through heavy holiday meals perfectly. The candy cane topping screams festive without complicated decorating skills.
Make this easy peppermint pie this weekend and discover your new holiday tradition.
📌 Save this Christmas peppermint pie recipe for holiday gatherings—it’s guaranteed to be everyone’s favorite dessert!
Ingredients
Method
- Crush cookies finely using a food processor or place in a zip-top bag and crush with rolling pin. You need exactly 1½ cups of fine crumbs—larger chunks make the crust crumble when slicing.
- Melt butter in a microwave-safe bowl in 15-second intervals until completely liquid. Pour over cookie crumbs and mix thoroughly with a spatula until all crumbs are moistened evenly.
- Press into pie plate by transferring mixture to a 9-inch pie dish and pressing firmly across bottom and up sides. Use the bottom of a glass to pack it tightly. Refrigerate for 30 minutes to set.
- Beat cream cheese in a large bowl with an electric mixer on medium speed for 2-3 minutes until completely smooth. Scrape bowl sides frequently to ensure no lumps remain.
- Add sugar and extract by mixing in sifted powdered sugar and beating until fluffy. Add peppermint extract and optional food coloring. Mix just until combined—don’t overbeat at this stage.
- Whip heavy cream in a separate cold bowl with clean beaters until stiff peaks form. This takes 3-5 minutes on medium-high speed. Stop when peaks stand straight up when beaters are lifted.
- Fold together gently by adding one-third of whipped cream to cream cheese mixture and folding to lighten. Add remaining whipped cream and fold very gently with a spatula until no streaks remain.
- Fill the crust by spooning peppermint mixture into chilled chocolate crust and spreading evenly. The filling should be light and airy—don’t press it down or deflate the mixture.
- Chill for minimum 4 hours or ideally overnight covered loosely with plastic wrap. Don’t let plastic touch the filling surface. This chilling time is non-negotiable for proper setting and clean slices.
- Garnish before serving by sprinkling crushed candy canes over the top just before cutting. Add optional whipped cream swirls and mint sprigs for extra festive presentation.


")