
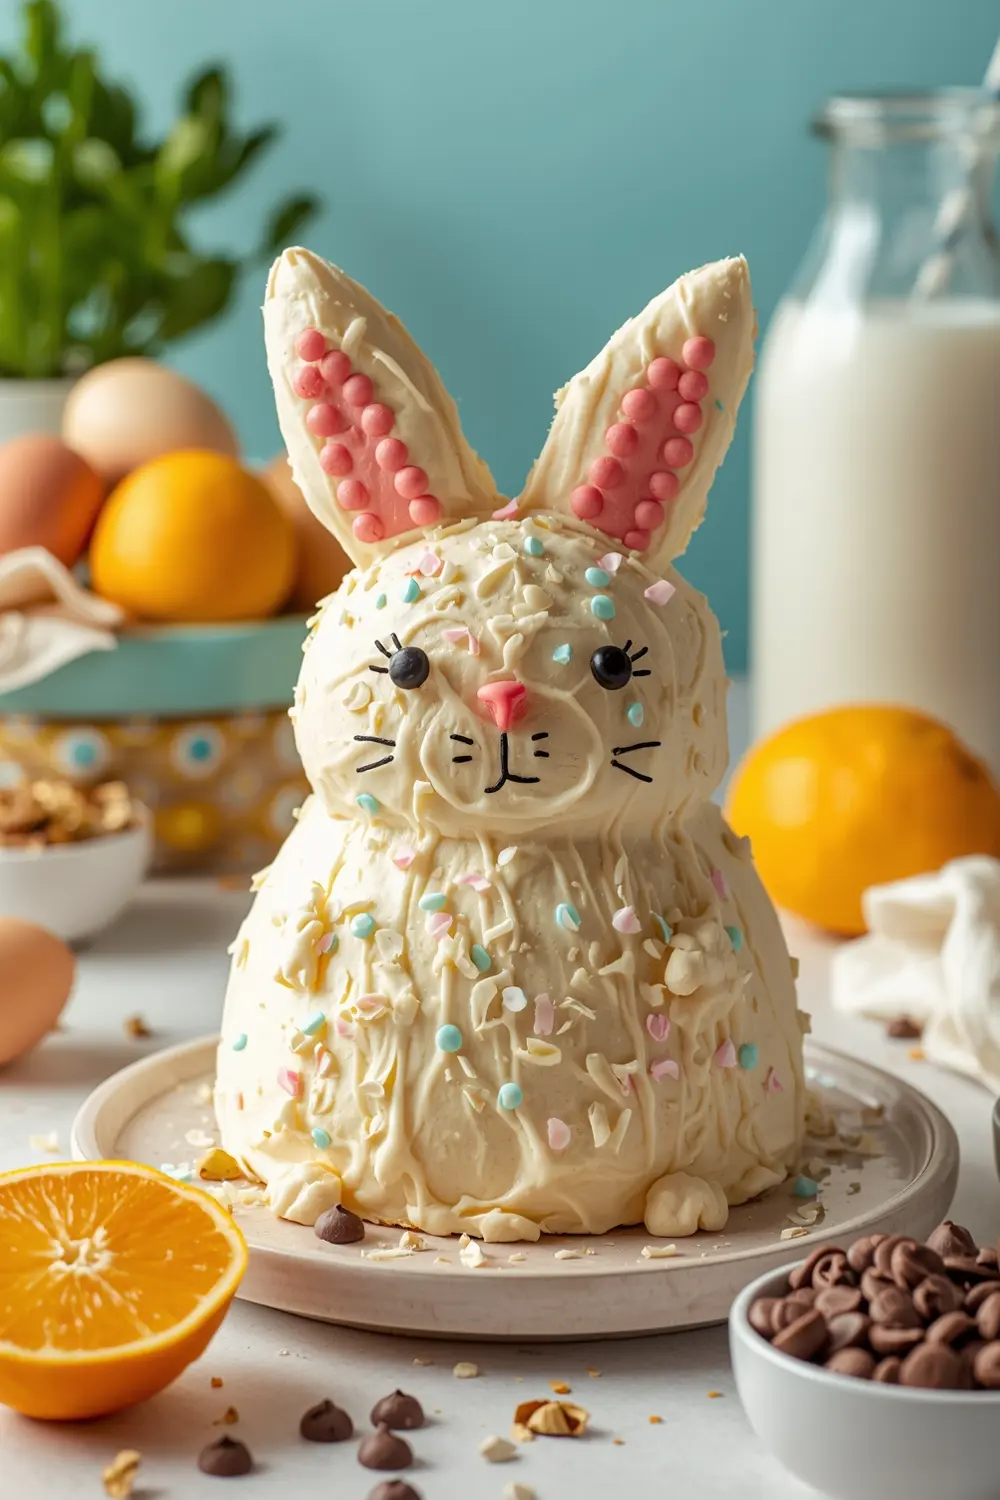
This Easter bunny cake recipe comes together faster than you’d think, and honestly, it’s become my go-to when I need something that’ll make the kids lose their minds. The bunny shape isn’t complicated—it’s just two round cakes stacked with some clever decorating that looks way more impressive than it actually is.
My first Easter baking disaster involved way too much frosting and a bunny that looked more like a lumpy potato, so I simplified everything. Now I’ve got a method that even my 7-year-old can help with without things going sideways.
Need a cute Easter dessert that won’t keep you in the kitchen all day? This bunny cake recipe easy approach means you’ll have time to actually enjoy the holiday. Save this for later and bookmark it for your Easter baking with kids plans!
If you’re already thinking about spring cake decorating ideas, you’re gonna love how customizable this is with fun toppings and colors.
Why this Easter bunny cake works
Ever notice how the best desserts are the ones kids actually want to help make? This bunny cake recipe delivers exactly that—it’s simple enough for little hands but looks totally impressive on the table.
- No special pans or equipment needed—just two round cake pans and basic tools
- Orange zest and chocolate chips add unexpected flavor that makes this taste way better than plain vanilla
- The coconut “fur” creates adorable texture while hiding any imperfect frosting spots
- Comes together in about an hour from start to serving, making it perfect for busy weeknights
| Prep Time | Cook Time | Calories | Servings | Cuisine |
|---|---|---|---|---|
| 25 minutes | 35 minutes | 285 per serving | 12 servings | American |
Ingredients for Easter bunny cake recipe
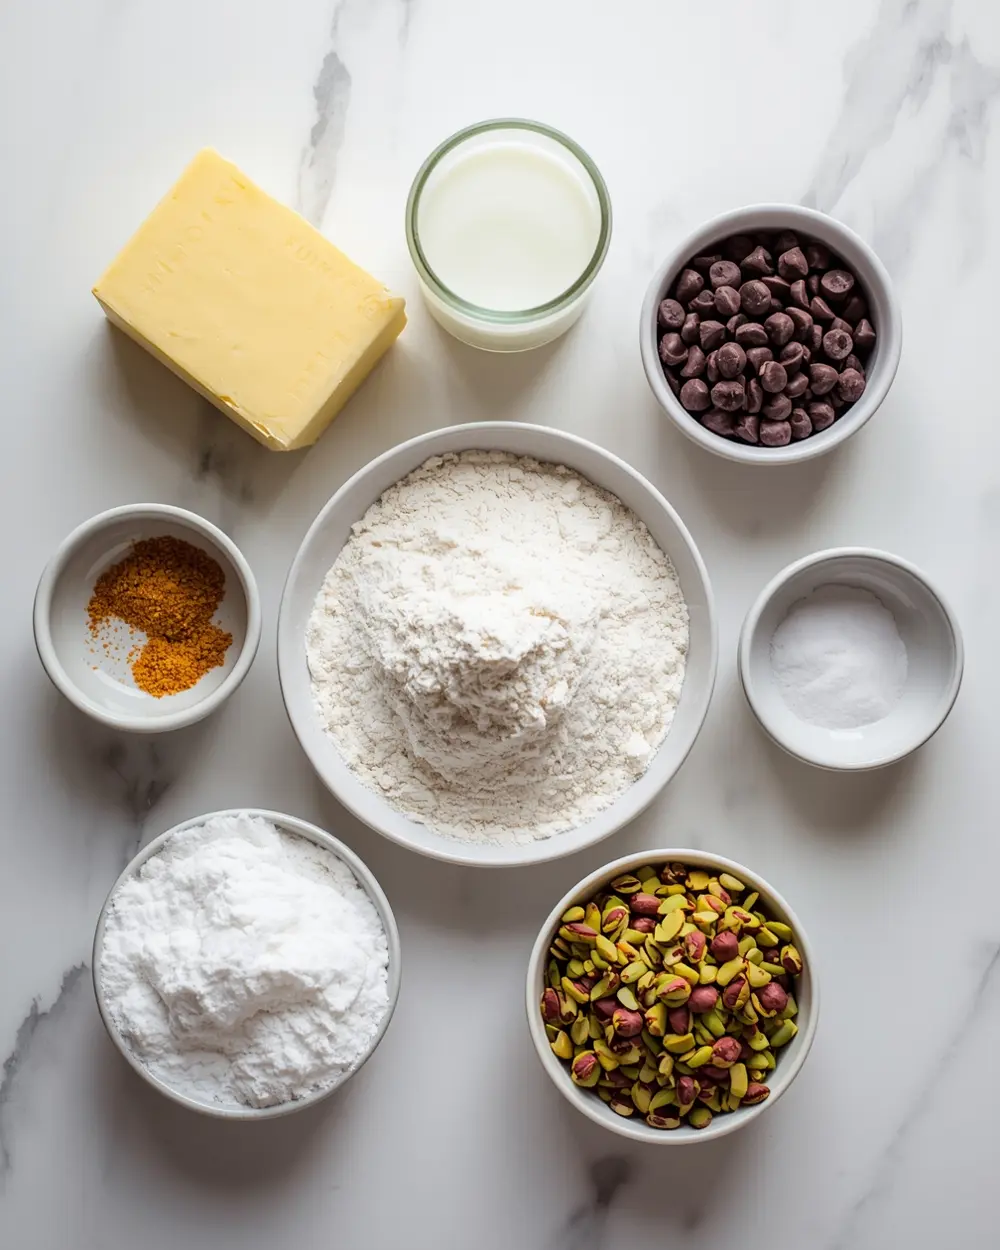
- 2 cups all-purpose flour
- 1 cup granulated sugar
- 1/2 cup unsalted butter
- 3 large eggs
- 1/2 cup whole milk
- 2 tsp baking powder
- 1/4 tsp salt
- 1/2 cup chocolate chips
- 1 tsp vanilla bean paste
- 1/4 cup orange zest
- 1/2 cup shredded coconut
- 1/4 cup chopped pistachios
The orange zest is honestly what sets this Easter bunny cake apart from typical vanilla versions. I started adding it on a whim one year when I had leftover citrus, and now I can’t imagine making it without that subtle brightness cutting through the sweetness.
Skip the vanilla bean paste if you only have regular vanilla extract—just use 1 teaspoon instead. The chocolate chips can swap for mini chips if that’s what you’ve got, and the pistachios are totally optional (though they add a pretty pop of green color that screams springtime).
Step-by-step instructions
1. Preheat your oven to 350°F and grease two 8-inch round cake pans with butter or cooking spray. Line the bottoms with parchment paper—this is the one step I never skip because it prevents sticking disasters. Let the pans sit ready while you mix your batter.
2. Cream together the softened butter and granulated sugar in a large bowl for about 2 minutes until it’s light and fluffy. You’ll notice the mixture changes color and gets all airy—that’s exactly what you want. Add the 3 eggs one at a time, beating well after each addition.
3. Stir in the vanilla bean paste and orange zest, mixing until everything’s combined and you can smell that citrus hitting the air (seriously amazing). In a separate bowl, whisk together the flour, baking powder, and salt. Fold the dry ingredients into the wet mixture, alternating with the milk—dry, wet, dry, wet, dry—keeping the batter smooth.
4. Fold in the chocolate chips and shredded coconut gently so they’re distributed throughout without overdoing it. Divide the batter evenly between your two prepared pans and smooth the tops with a spatula. Pop them into the preheated oven and bake for 32-35 minutes until a toothpick inserted in the center comes out clean.
5. Let the cakes cool in the pans for about 10 minutes, then turn them out onto wire racks to cool completely. This step’s crucial—don’t skip it because a warm cake falls apart when you try to frost it. I learned that the hard way and ended up with bunny cake crumbs instead of a bunny cake.
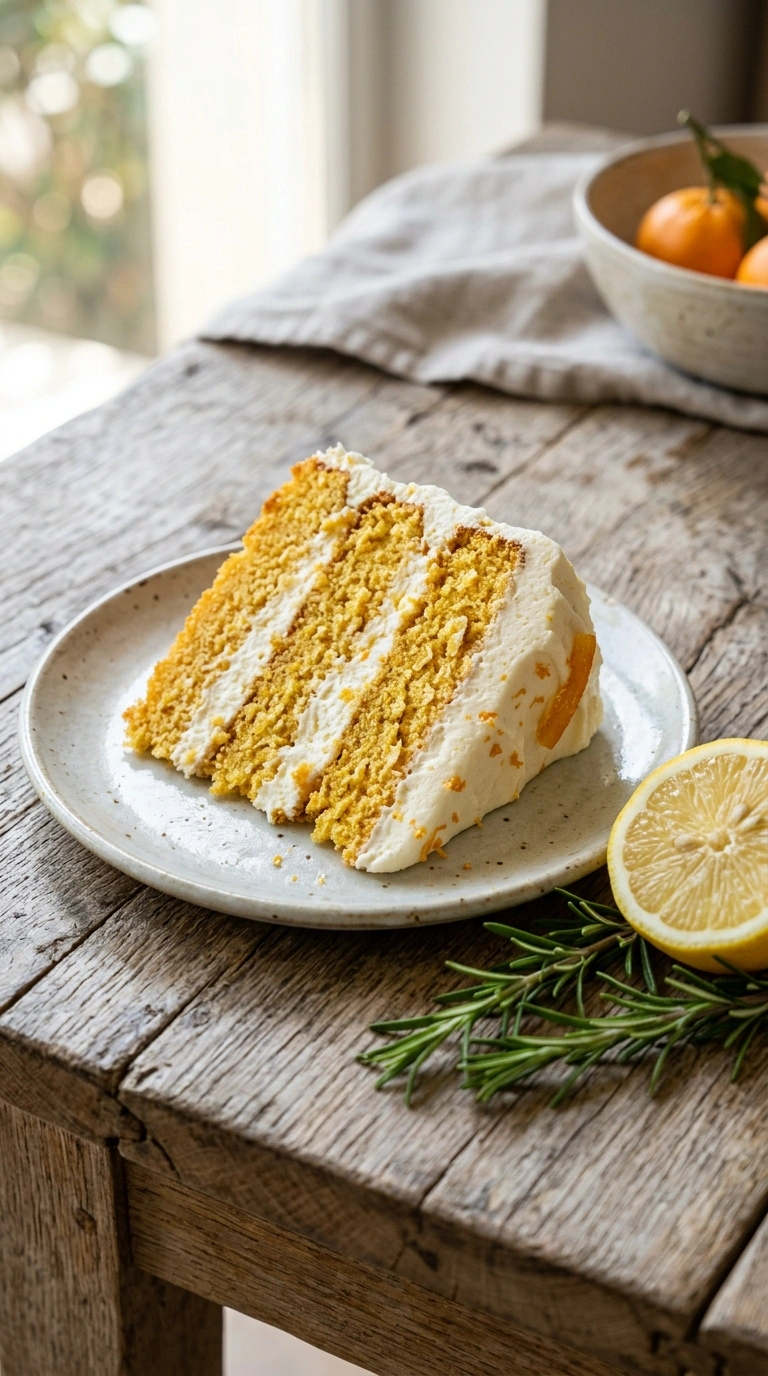
6. Once cooled, place one cake layer flat on your serving plate and frost the top generously with buttercream or cream cheese frosting. Stack the second layer on top and frost the entire outside. The Easter bunny cake really comes together at this point—you’ve got your base ready for decorating.
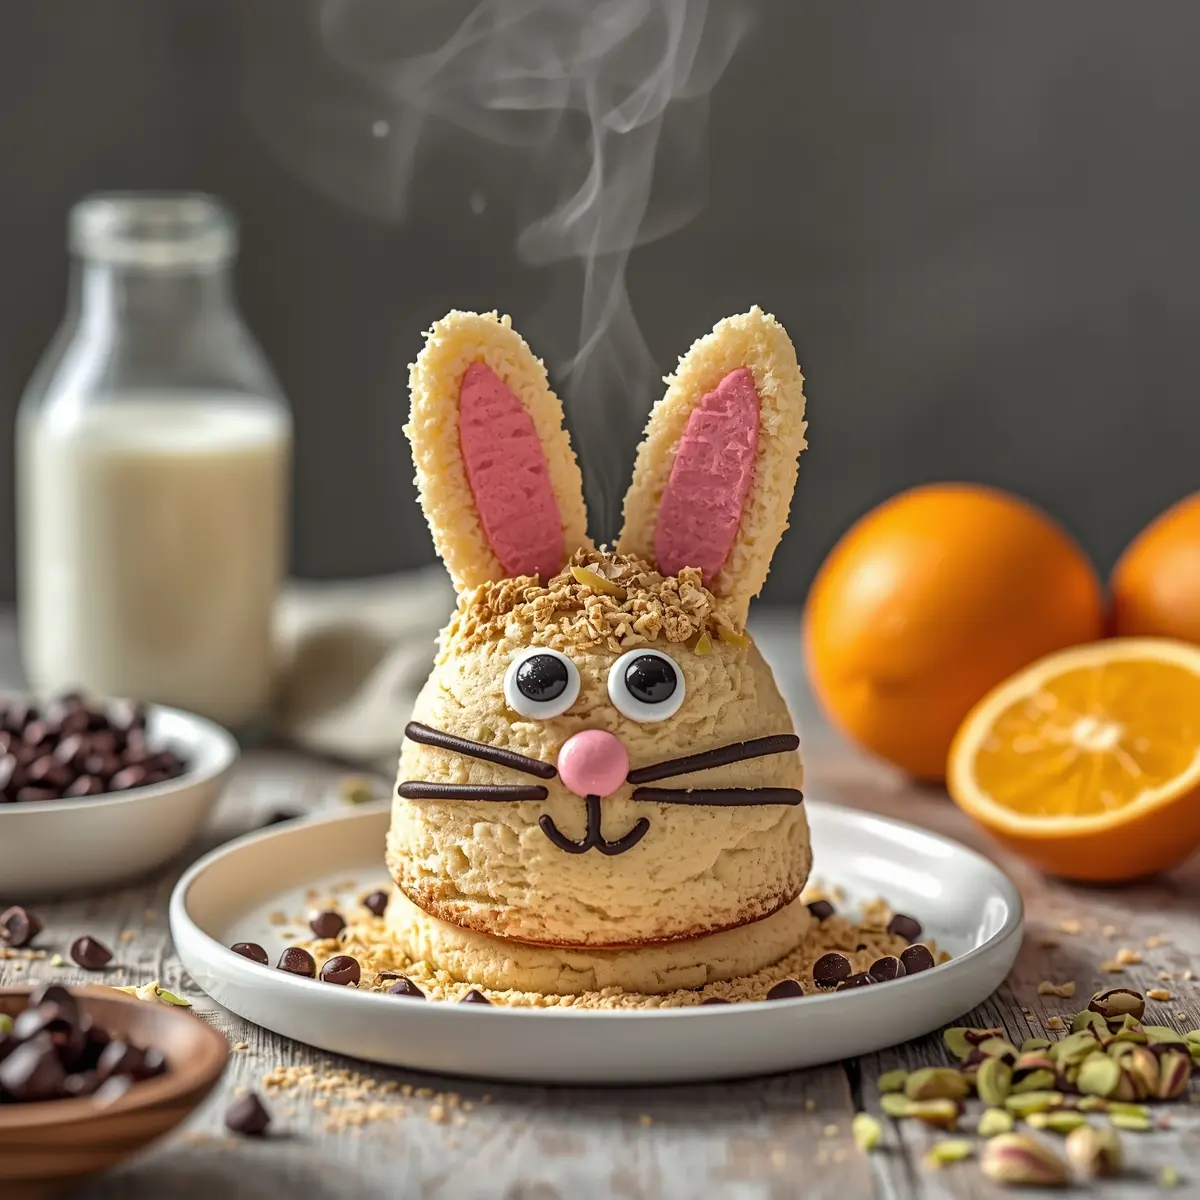
7. Press the chopped pistachios all over the frosted sides and top to create the “fur” effect, then add two almond slivers for ears and chocolate chips for eyes. You can pipe a tiny buttercream nose or add a pink frosting dot. Step back and admire your creation—it actually looks like a bunny!
Serving ideas for Easter bunny cake recipe
This bunny cake recipe easy decorating means you’ve got plenty of time to think about what goes alongside it.
With Fresh Whipped Cream and Berries
Fresh strawberries or raspberries pile next to your Easter bunny cake slice for a bright, springy touch. The tartness of the berries balances the sweetness perfectly, and whipped cream makes everything feel fancier than it actually is.Paired with Lemon Curd or Jam
A spoonful of homemade lemon curd on the side adds another layer of citrus that matches the orange zest in the cake itself. This works especially well if you’re serving at brunch time and want something that feels elegant but still fun for the kids.Served with Chocolate Sauce
Drizzle warm chocolate sauce over your slice for those chocolate lovers in the family who think more chocolate is always the answer (they’re not wrong). This cute Easter dessert gets even more decadent, and honestly, it’s the version my husband requests every single time. You could even pair this with homemade chocolate sauce recipes for an extra special touch.Pro tips for perfect Easter bunny cake recipe
Storage tips
– Keep leftover cake covered in an airtight container at room temperature for up to 2 days – Refrigerate if your kitchen’s warm or if it’s frosted with cream cheese frosting – The bunny cake stays fresh-tasting longer than you’d expect thanks to the moisture from citrus and coconutMake-ahead instructions
– Bake the cake layers a full day before and wrap them in plastic wrap unfrosted – Frost and decorate up to 4 hours before serving so everything stays fresh and pretty – You can even make the bunny cake cake itself 3 days ahead and freeze the layers wrapped tightlyVariations
– Use lemon zest instead of orange for a different spring flavor profile that’s equally delicious – Add 1/2 teaspoon of almond extract to the batter for a subtle nutty undertone – Swap the pistachios for toasted coconut flakes or crushed white chocolate for a different bunny coat textureTroubleshooting
– If the cake looks watery at first, don’t panic—it sets up as it cools and the flavors meld together – Dry cake means you overbaked it, so watch carefully after minute 30 and use the toothpick test religiously – Bunny ears breaking off? Use a toothpick dipped in frosting to secure them betterFrequently asked questions
How long does Easter bunny cake last in the fridge?
Your frosted Easter bunny cake recipe stays fresh in the refrigerator for up to 3 days in an airtight container. After day two, you might notice the cake getting a little denser, but it’s still totally edible and tastes pretty great. The flavors actually get more pronounced on day two, so sometimes I think it tastes even better the next day.
Can I freeze this bunny cake recipe easy ahead of time?
Yes, you can absolutely freeze the unfrosted cake layers for up to 3 months when wrapped tightly in plastic wrap and foil. Let them thaw at room temperature for about 2 hours before frosting, and they’ll be perfect. I don’t recommend freezing the frosted and decorated bunny cake because the frosting texture changes when thawed, though the cake itself is fine.
What if I don’t have vanilla bean paste?
Regular vanilla extract works great as a substitute—just use 1 teaspoon instead of the 1 teaspoon vanilla bean paste. The paste has little black specks that look pretty but don’t change the actual flavor enough to worry about. The orange zest is really what makes this Easter bunny cake special anyway.
Can I make this bunny cake recipe without eggs?
You can try using a flax or chia egg substitute (1 tablespoon ground flax plus 3 tablespoons water per egg), but I haven’t personally tested it so I can’t guarantee the texture. The traditional eggs help the cake stay moist and fluffy, so you might end up with something denser. Honestly, I’d stick with regular eggs for this one.
Final thoughts
This Easter bunny cake recipe is hands down the easiest cute Easter dessert you can make, and your family’s gonna go absolutely wild for it. The combination of orange, chocolate, and coconut makes it taste special without any complicated techniques or fancy equipment.
Easter baking with kids becomes way less stressful when you’ve got a recipe this forgiving and this adorable. Seriously—pin this now and come back Easter weekend because you’ll want it ready to go.
Your guests will have no idea how simple this bunny cake recipe easy method actually was, and you can totally keep that our secret. Check out more of my holiday cake fun ideas for other seasonal desserts that impress without the stress!
Easter Bunny Cake So Cute the Kids Will Scream
Ingredients
Method
- Preheat your oven to 350°F and grease two 8-inch round cake pans with butter or cooking spray. Line the bottoms with parchment paper—this is the one step I never skip because it prevents sticking disasters. Let the pans sit ready while you mix your batter.
- Cream together the softened butter and granulated sugar in a large bowl for about 2 minutes until it’s light and fluffy. You’ll notice the mixture changes color and gets all airy—that’s exactly what you want. Add the 3 eggs one at a time, beating well after each addition.
- Stir in the vanilla bean paste and orange zest, mixing until everything’s combined and you can smell that citrus hitting the air (seriously amazing). In a separate bowl, whisk together the flour, baking powder, and salt. Fold the dry ingredients into the wet mixture, alternating with the milk—dry, wet, dry, wet, dry—keeping the batter smooth.
- Fold in the chocolate chips and shredded coconut gently so they’re distributed throughout without overdoing it. Divide the batter evenly between your two prepared pans and smooth the tops with a spatula. Pop them into the preheated oven and bake for 32-35 minutes until a toothpick inserted in the center comes out clean.
- Let the cakes cool in the pans for about 10 minutes, then turn them out onto wire racks to cool completely. This step’s crucial—don’t skip it because a warm cake falls apart when you try to frost it. I learned that the hard way and ended up with bunny cake crumbs instead of a bunny cake.
- Once cooled, place one cake layer flat on your serving plate and frost the top generously with buttercream or cream cheese frosting. Stack the second layer on top and frost the entire outside. The Easter bunny cake really comes together at this point—you’ve got your base ready for decorating.
- Press the chopped pistachios all over the frosted sides and top to create the “fur” effect, then add two almond slivers for ears and chocolate chips for eyes. You can pipe a tiny buttercream nose or add a pink frosting dot. Step back and admire your creation—it actually looks like a bunny!
")