
Everyone thinks Easter pretzel bites recipe requires a stand mixer and advanced bread skills. That’s completely wrong. I’ve been making these for three years now, and the easiest batches happen when I skip the fancy equipment entirely. The warm, buttery smell hits your kitchen within minutes—that’s how you know you’re doing this right. This approach works every single time, which is why I’m sharing it instead of the complicated versions floating around online.
Here’s the real thing: soft pretzels intimidate people for no reason. You don’t need special tools or a culinary degree to nail them. My neighbor Sarah watched me make these last Easter and couldn’t believe how simple the process actually was. She’s made them three times since. That’s the kind of recipe worth pinning for your next spring party or busy weeknight.
Want to know what makes this different from every other pretzel recipe out there? Keep reading—I’m breaking down exactly why this method beats the competition.
What everyone gets wrong about Easter pretzel bites recipe
Most people overcomplicate the dough by mixing it too much or letting it rise too long. They end up with dense, chewy bites instead of soft, pillowy ones. The real secret isn’t some fancy ingredient—it’s understanding when to stop handling the dough and trusting the process.
Here’s what this method delivers:
- Soft centers that stay tender even after cooling, unlike dense store-bought versions
- Quick rise time because we’re not waiting around for hours like traditional pretzel recipes demand
- Kid-friendly shapes you can customize for Easter without any special equipment needed
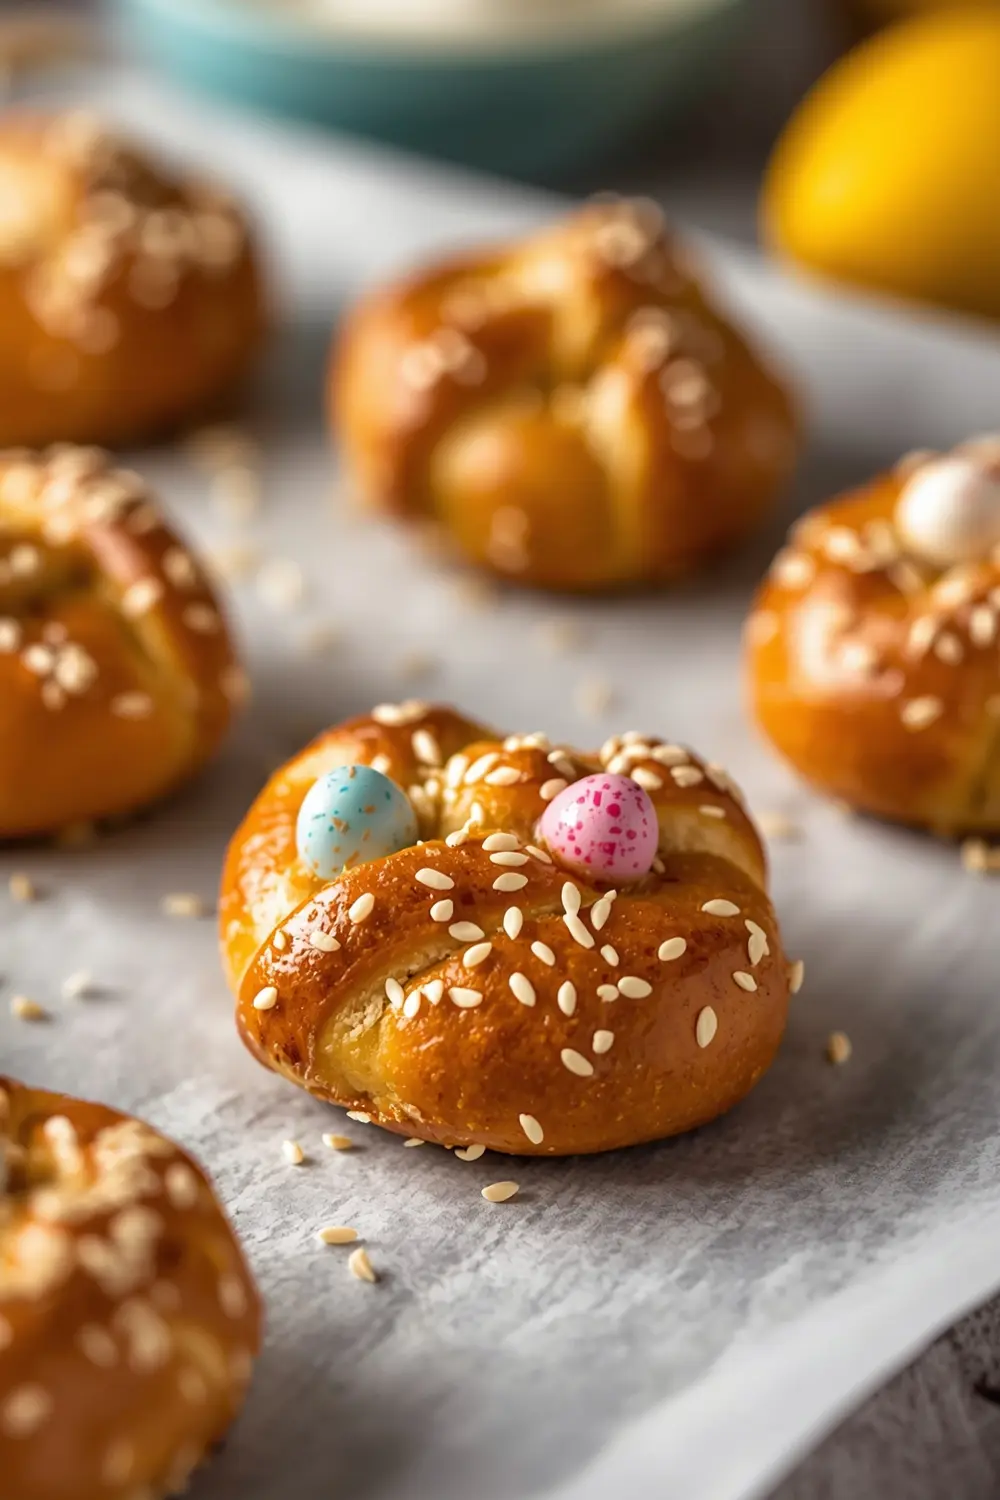
- Crispy-soft exterior contrast that happens when you use the baking soda bath correctly
Ingredients for Easter pretzel bites recipe
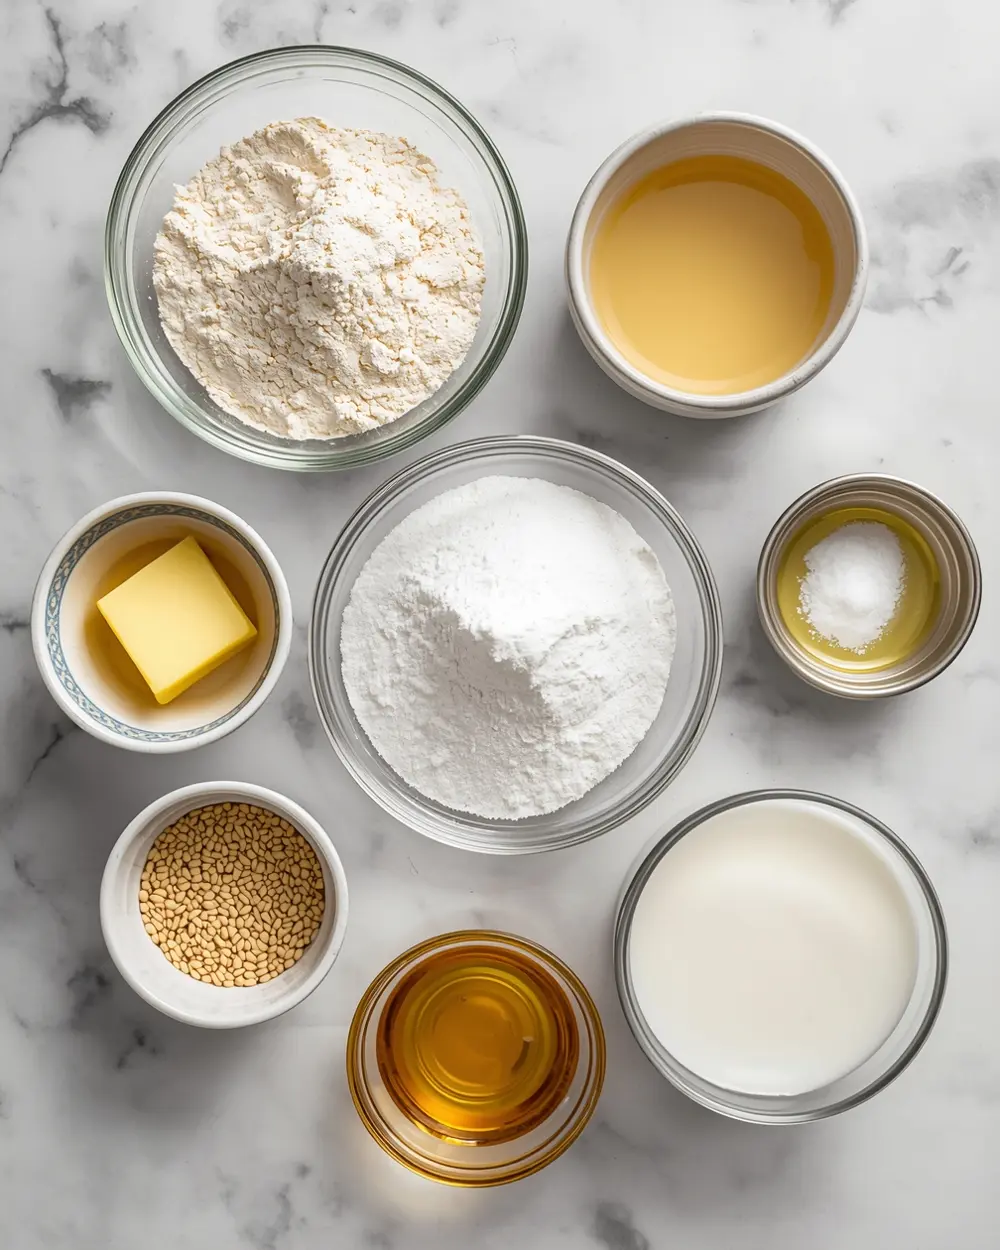
- 2 cups all-purpose flour
- 1 tsp instant yeast
- 1 tsp granulated sugar
- 1/2 tsp salt
- 1 tbsp melted butter
- 1/2 cup warm water
- 1 large egg
- 2 tbsp milk
- 1 tsp honey
- 1 tbsp sesame seeds
- 1 tsp baking soda
- 1 tbsp olive oil
The flour is your foundation here—you want all-purpose, nothing fancy. Make sure your water is warm but not hot. I personally think instant yeast works better than active dry because it dissolves faster and gives more consistent results.
The texture of the dough should feel slightly tacky but not sticky. It’ll be a little bit wetter than regular bread dough, and that’s exactly what you want. Don’t panic if it looks shaggy at first—that’s normal. Trust me on this: if you add more flour, your bites will come out dense instead of soft.
Step-by-step instructions
1. Mix your flour, yeast, sugar, and salt in a large bowl. Make a small well in the center and pour in the warm water and melted butter. Stir everything together until a shaggy dough forms. Don’t worry about lumps—we’re not going for perfection here. Use a wooden spoon or your hands to combine. This takes about 2 minutes total.
2. Knead the dough gently for 3 to 4 minutes until it comes together. It should feel slightly tacky but hold its shape when you press it. The dough won’t be perfectly smooth, and that’s fine. I always knead mine right in the bowl to save cleanup time. Stop kneading as soon as it holds together—overmixing is the enemy here.
3. Cover your bowl with a damp towel and let it rise for 20 minutes at room temperature. You’ll hear the bowl shift slightly as the dough rises. You’ll see tiny bubbles forming on the surface. Don’t let it rise longer than 25 minutes or the texture gets weird. Mine always rises perfectly in my kitchen by the window on sunny days.
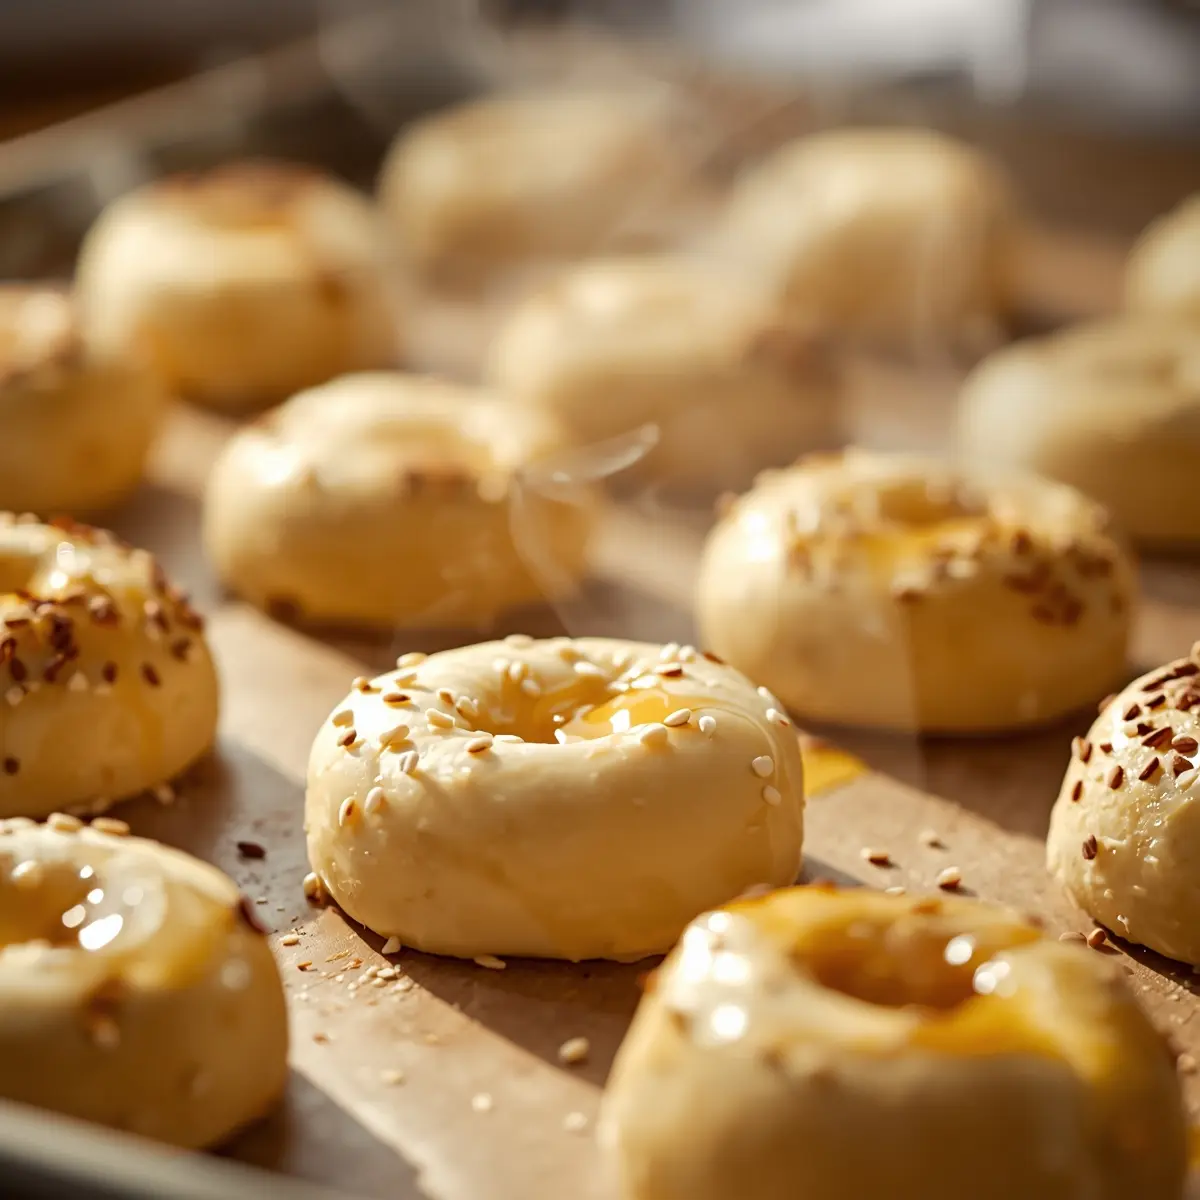
4. While the dough rises, prepare your baking soda bath. Fill a shallow bowl with 2 cups of water and stir in the baking soda until it dissolves. This step is what creates that signature pretzel flavor and chewy exterior. Line a baking sheet with parchment paper and preheat your oven to 425°F. Get everything ready because you’ll move fast once the dough’s ready.
5. Turn the dough out onto a lightly floured surface and divide it into 24 equal pieces. Roll each piece into a ball, then gently stretch it into a short rope about 4 inches long. Don’t stress about perfect shapes—rustic looks better anyway. I use my palms to roll them, which is faster than trying to be precise. These don’t need to be identical to taste amazing.
6. Drop each dough rope into the baking soda bath for 30 seconds per side. Use a slotted spoon to fish them out and place them on your prepared baking sheet. When your kitchen smells like warm toasted bread and salt, you’re doing this right. The pretzel bites should smell a little bit earthy and nutty at this point. That’s your cue that the baking soda is doing its job.
7. Whisk together the egg, milk, and honey to make your egg wash. Brush it generously over each pretzel bite, then sprinkle with sesame seeds. Bake for 15 to 18 minutes until golden brown on top. Let them cool for 5 minutes on the baking sheet before moving them to a wire rack. They’ll firm up slightly as they cool but stay soft inside.
Serving ideas for Easter pretzel bites recipe

These bites shine with the right pairings.
Warm Cheese Dip Combo
Serve your Easter pretzel bites alongside a warm, creamy cheese dip while they’re still steaming from the oven. The contrast between the crispy-soft exterior and the melty, rich dip creates the perfect texture and temperature combination. I like pairing mine with garlic butter shrimp recipes that use similar dipping sauces—the flavors complement each other beautifully.
Honey Mustard Glaze Station
Mix equal parts honey and spicy brown mustard for a tangy dipping sauce that cuts through the saltiness. The pretzel bites stay tender while the glaze adds a bright, savory kick. Set up a little station with small bowls of different mustards so guests can choose their own adventure.
Spring Salad Starter
Tear a few pretzel bites in half and toss them into a light spring salad with fresh greens and vinaigrette. The soft interior absorbs the dressing while the exterior stays slightly chewy. This works great for Easter brunches when you want something substantial but not too heavy.
Frequently asked questions
Can you freeze Easter pretzel bites recipe?
Yes, freeze them in an airtight container for up to 3 months. Let them thaw at room temperature for 30 minutes before reheating. Reheat in a 350°F oven for 5 to 7 minutes to restore the soft texture.
They thaw best on the counter rather than in the fridge. This prevents them from drying out during the warming process.
What if I don’t have sesame seeds?
Use poppy seeds, everything bagel seasoning, or coarse sea salt instead. You can also skip seeds entirely and just brush with egg wash for a plain soft pretzel bite. All three options taste equally good—it’s just personal preference.
Honestly, the coarse sea salt gives the most authentic pretzel flavor. That’s what I reach for when I’m out of sesame seeds.
How do you reheat leftover pretzel bites?
Warm them in a 350°F oven for 5 to 7 minutes until heated through. Don’t use the microwave—it makes them rubbery and tough. A quick oven warm-up restores the soft, tender texture perfectly.
If you’re reheating from frozen, add 2 to 3 extra minutes to the baking time. They’ll come out tasting almost as good as fresh.
Should you skip the baking soda bath for Easter pretzel bites recipe?
Don’t skip it—this step is what makes them taste like real pretzels. The baking soda raises the pH level and creates that chewy exterior and signature pretzel flavor. It’s the one technique that separates these from regular bread bites.
Without the bath, you’re basically making soft bread rolls, not pretzels. The difference in taste is honestly night and day.
Final thoughts
You now know something most people never figure out: Easter pretzel bites recipe works because you’re not overthinking it. The simplicity is the entire point. Skip the complicated steps and trust that warm water, basic yeast, and a 20-minute rise are genuinely enough.
My family requests these constantly now. My mom actually asked me to make them for her book club last month, and three people asked for the recipe afterward. That’s the kind of reaction you get when you nail the soft, tender texture that store-bought versions can’t match.
The real magic happens when you bite into one and that warm, slightly salty exterior gives way to the soft, pillowy center. It’s warm against your tongue, and the honey-butter flavor lingers. That’s the textural contrast that proves this method works—and it’s something you can’t get any other way.
Want more easy appetizer ideas for your next gathering? Check out our spring party food collection for more crowd-pleasers that come together just as fast. You’ve got this—now go make some pretzel bites and watch everyone wonder why they never tried making them at home before.


")