

When summer peaches are at their peak, you need a rustic peach galette on your table. This free form pastry is honestly the easiest way to show off fresh fruit without fussing over pie crimps or fancy techniques.
I discovered this beauty a few years ago when I had way too many peaches and zero patience for traditional pie-making. The gorgeous, imperfect edges? That’s literally the point—no rolling out to exact sizes or stressing about perfection required.
If you’re looking for an impressive entertaining dessert that tastes like you spent hours in the kitchen, bookmark this recipe for later. Your guests won’t believe how simple it actually is.
Want an elegant tart that doubles as a conversation starter? I’ve also made Easter mint brownies for fancy gatherings, but nothing beats the natural beauty of a rustic peach galette in summer.
Why this rustic peach galette works
Ever made a pie and felt like something went wrong halfway through? This easy summer tart takes away all that pressure because the rustic look is intentional. I’ve tested this a dozen times, and it comes out gorgeous every single time.
- Easy enough for weeknight dessert, yet polished enough for dinner parties and entertaining
- Free form pastry means no pie pan, no crimping, just fold and bake
- Fresh peaches with warm cinnamon creates that cozy comfort flavor everyone craves
- Ready in just over an hour from start to table—perfect for busy schedules
| Prep Time | Cook Time | Calories | Servings | Cuisine |
|---|---|---|---|---|
| 25 minutes | 40 minutes | 285 per serving | 8 servings | American |
Ingredients for rustic peach galette
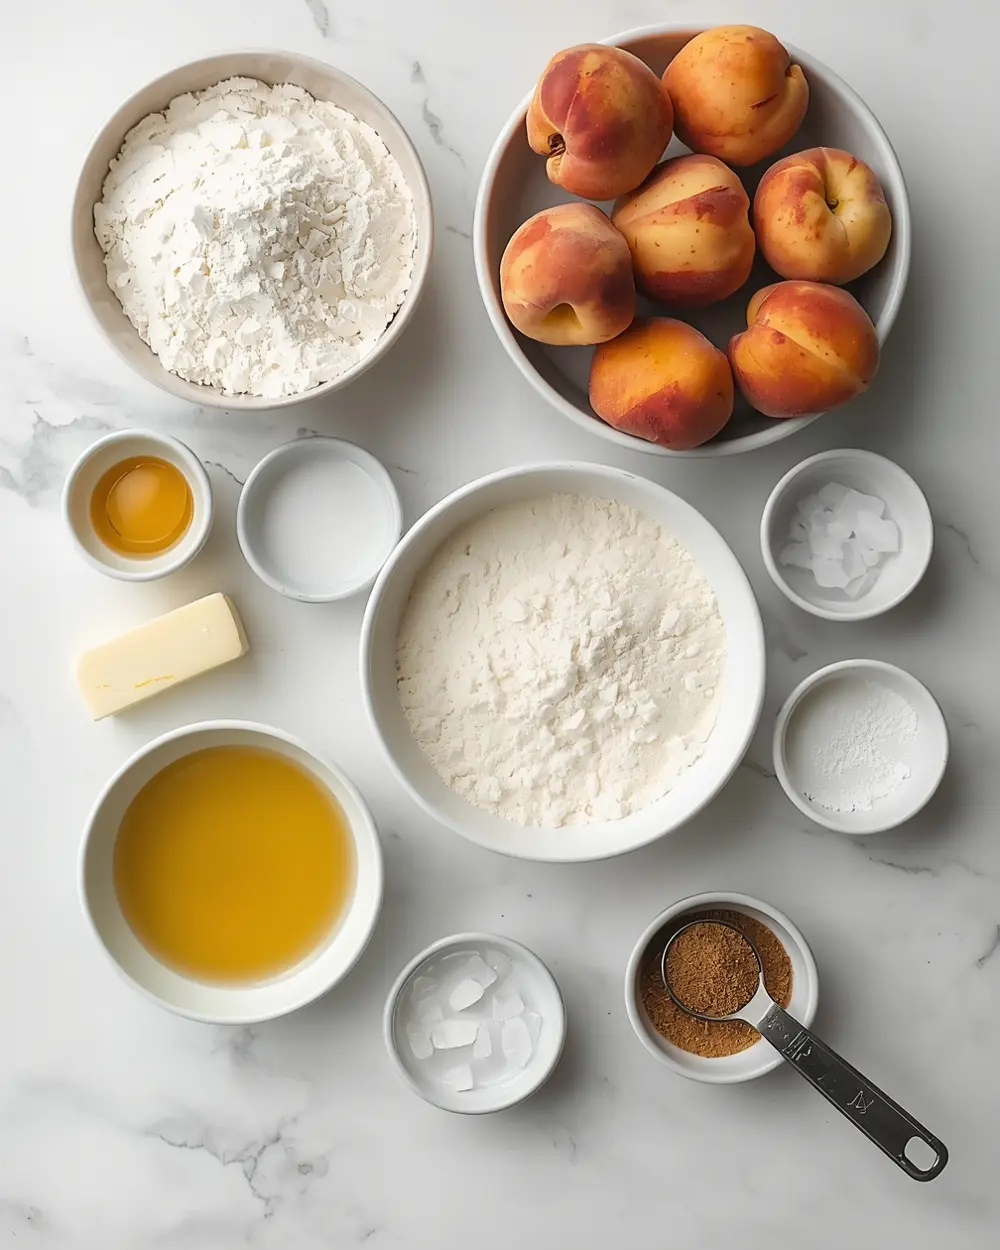
- 2 cups all-purpose flour
- 1/2 cup granulated sugar
- 1/2 teaspoon salt
- 1/2 cup unsalted butter, cold and diced
- 1 large egg for egg wash
- 1 tablespoon ice water
- 4 medium peaches, peeled and sliced
- 1/4 cup brown sugar
- 1 teaspoon vanilla extract
- 1/2 teaspoon ground cinnamon
- 1 tablespoon lemon juice
- 1 tablespoon cornstarch
Don’t skip the cornstarch in this rustic peach galette recipe—it absorbs all that delicious peach juice so your crust doesn’t get soggy. I learned this the hard way after my first galette turned into basically peach soup.
You can swap the peaches for nectarines, plums, or even a mix if you want. The beauty of this rustic entertaining dessert is its flexibility—whatever stone fruit you grab will taste amazing in this setup.
Step-by-step instructions
1. Make your pastry dough by mixing 2 cups flour, 1/2 cup sugar, and 1/2 teaspoon salt in a large bowl. Cut in the cold butter using a fork or pastry cutter until the mixture looks like coarse breadcrumbs. Add the ice water one tablespoon at a time, stirring gently until the dough just comes together—don’t overwork it or your crust gets tough.
2. Form the dough into a disk, wrap it in plastic wrap, and chill for at least 15 minutes while you prep the peaches. This resting time is essential because cold dough rolls out easier and creates that flaky, tender texture we’re after.
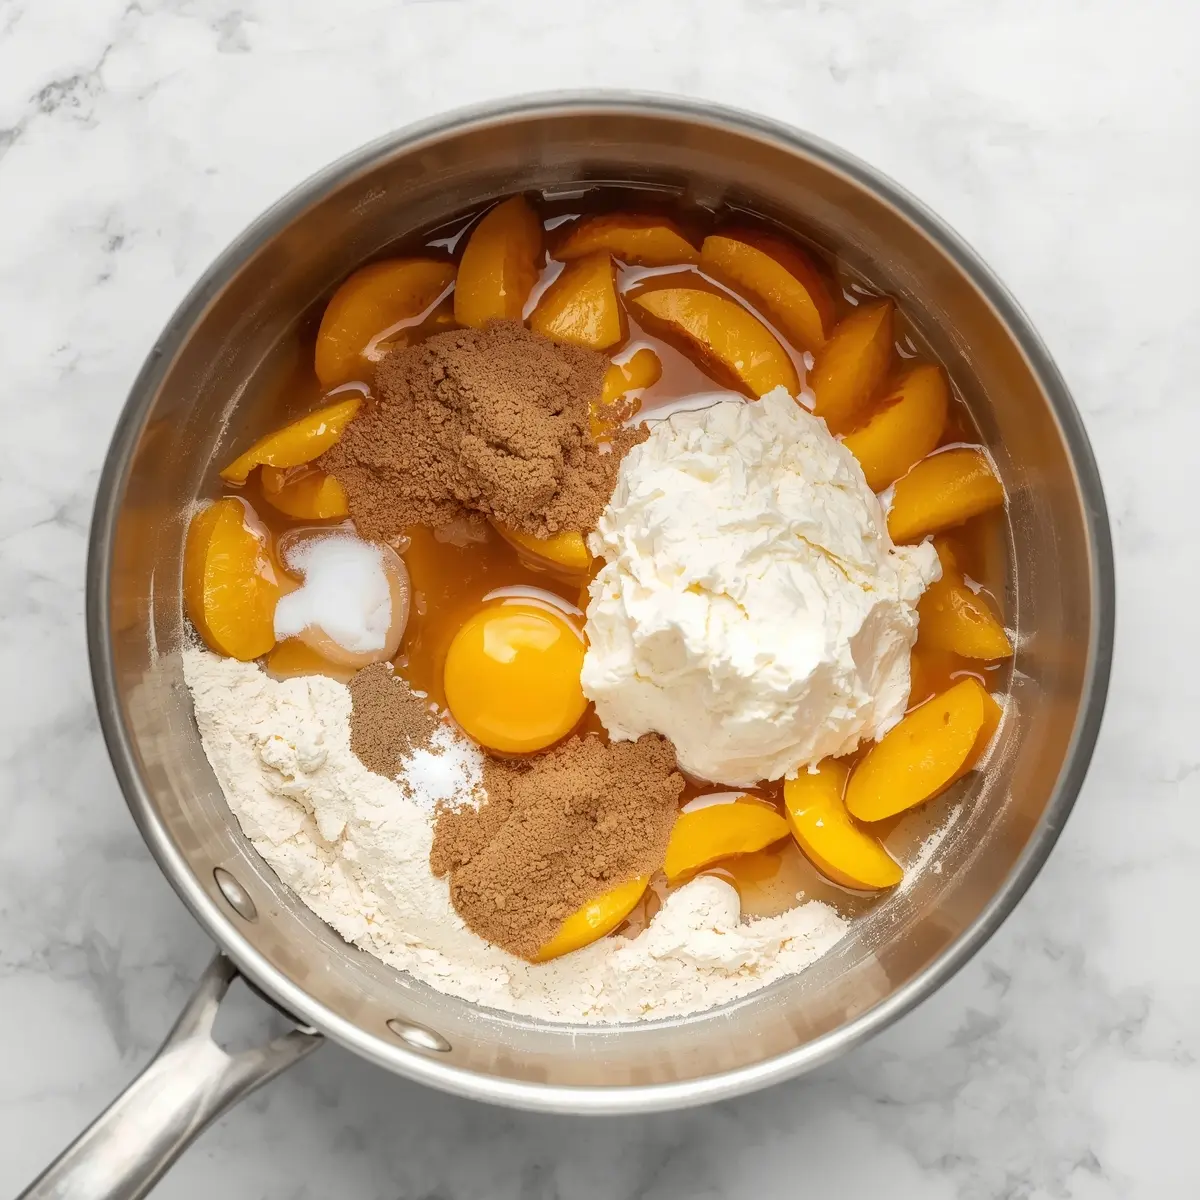
3. Peel and slice your 4 medium peaches (I run them under hot water for 30 seconds, then the skin slides right off). Toss the slices with 1/4 cup brown sugar, 1 teaspoon vanilla, 1/2 teaspoon cinnamon, 1 tablespoon lemon juice, and 1 tablespoon cornstarch—the cornstarch prevents that watery filling disaster.
4. Preheat your oven to 400°F. On a floured surface, roll out your chilled dough into a rough 12-inch circle (yes, rough is the goal here). Place it on a parchment-lined baking sheet—don’t stress about perfect edges, trust me.
5. Pile your peach mixture into the center of the dough, leaving about 2 inches of pastry around the edges. I arrange mine in a casual mound because the free form pastry style means every galette looks naturally different.
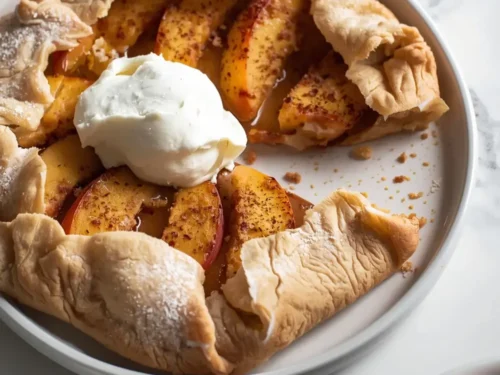
6. Fold the pastry edges up and over the peaches, creating those gorgeous rustic folds you see in every Pinterest picture. Brush the exposed dough with beaten egg wash for that beautiful golden finish.
7. Bake for 40 minutes until the crust is golden brown and you can see the peach juices bubbling slightly at the edges. Let it cool for 10 minutes before slicing—I know it’s hard to wait, but the filling sets up and holds together better.
Serving ideas for rustic peach galette
Your galette deserves the perfect pairing to make it shine.
Vanilla ice cream
Warm galette plus cold vanilla ice cream is basically mandatory. The ice cream melts into all those peachy juices and creates pure summer magic on every bite.Whipped cream and fresh mint
Keep things light and elegant by topping slices with fresh whipped cream and a few mint leaves. This pairs beautifully with the rustic peach galette and adds a restaurant-quality touch that looks like you planned it all along.Lemon yogurt
For a brunch-friendly twist, dollop Greek yogurt mixed with lemon zest on warm slices. The tartness cuts through the sweetness perfectly—it’s basically the same logic as making blueberry cheesecake bars no bake, just with more peaches involved.Pro tips for perfect rustic peach galette
Storage tips
– Keep covered at room temperature for up to 2 days – Store in the fridge for up to 4 days in an airtight container – Freezes beautifully for up to 3 months wrapped wellMake-ahead instructions
– Prepare the dough the night before and chill overnight – Assemble the entire galette 4 hours ahead, then bake when ready – Slice and reheat at 300°F for 8 minutes if making aheadVariations
– Try mixing stone fruits—nectarines, plums, and cherries work great – Add fresh ginger or cardamom for unexpected flavor depth – Brush dough edges with honey instead of egg wash for shineTroubleshooting
– If filling looks too watery, don’t panic—that cornstarch kicks in during baking – Crust browning too fast? Tent loosely with foil for the last 15 minutes – Dough too sticky? Add flour gradually to your work surface, not the dough itselfFrequently asked questions
Can I freeze a rustic peach galette?
Yes, absolutely—freeze it for up to three months either baked or unbaked. *Cool completely first, then wrap tightly in plastic wrap and foil.* Baked galettes reheat beautifully at 300°F for 8 minutes, and unbaked ones go straight from freezer to oven (just add 5 extra minutes to bake time).What if I don’t have fresh peaches?
You can use frozen peaches, but thaw them completely and drain off extra liquid first. Canned peaches work too—just make sure you drain the syrup really well so your filling doesn’t turn into soup.How do I reheat leftover rustic peach galette?
Warm slices at 300°F for 8 minutes until the crust is crispy again and the filling is warm. *Don’t microwave it*—the crust gets tough and chewy, which defeats the whole purpose of that flaky pastry texture.Can I make this with other fruits?
Totally—use any stone fruit or berry you like. Apple and berry combinations also work beautifully in this rustic entertaining dessert format.Final thoughts
This rustic peach galette proves that entertaining doesn’t require complicated techniques or stress. Your guests will think you spent all day in the kitchen, but you’ll know the secret is the simplicity.
The gorgeous imperfect edges actually make it look more impressive, not less. Plus, you can make it ahead and just pop it in the oven when guests arrive—literally zero pressure.
Whether you’re hosting a casual dinner or looking for an impressive dessert, this free form pastry delivers every single time. Check out Easter pavlova for another show-stopping dessert option, or save this one and pin it to your summer entertaining board for when those beautiful peaches hit the farmers market.
Rustic Peach Galette – Liz’s Beautiful Easy Summer Entertaining Dessert
Ingredients
Method
- Make your pastry dough by mixing 2 cups flour, 1/2 cup sugar, and 1/2 teaspoon salt in a large bowl. Cut in the cold butter using a fork or pastry cutter until the mixture looks like coarse breadcrumbs. Add the ice water one tablespoon at a time, stirring gently until the dough just comes together—don’t overwork it or your crust gets tough.
- Form the dough into a disk, wrap it in plastic wrap, and chill for at least 15 minutes while you prep the peaches. This resting time is essential because cold dough rolls out easier and creates that flaky, tender texture we’re after.
- Peel and slice your 4 medium peaches (I run them under hot water for 30 seconds, then the skin slides right off). Toss the slices with 1/4 cup brown sugar, 1 teaspoon vanilla, 1/2 teaspoon cinnamon, 1 tablespoon lemon juice, and 1 tablespoon cornstarch—the cornstarch prevents that watery filling disaster.
- Preheat your oven to 400°F. On a floured surface, roll out your chilled dough into a rough 12-inch circle (yes, rough is the goal here). Place it on a parchment-lined baking sheet—don’t stress about perfect edges, trust me.
- Pile your peach mixture into the center of the dough, leaving about 2 inches of pastry around the edges. I arrange mine in a casual mound because the free form pastry style means every galette looks naturally different.
- Fold the pastry edges up and over the peaches, creating those gorgeous rustic folds you see in every Pinterest picture. Brush the exposed dough with beaten egg wash for that beautiful golden finish.
- Bake for 40 minutes until the crust is golden brown and you can see the peach juices bubbling slightly at the edges. Let it cool for 10 minutes before slicing—I know it’s hard to wait, but the filling sets up and holds together better.

")