
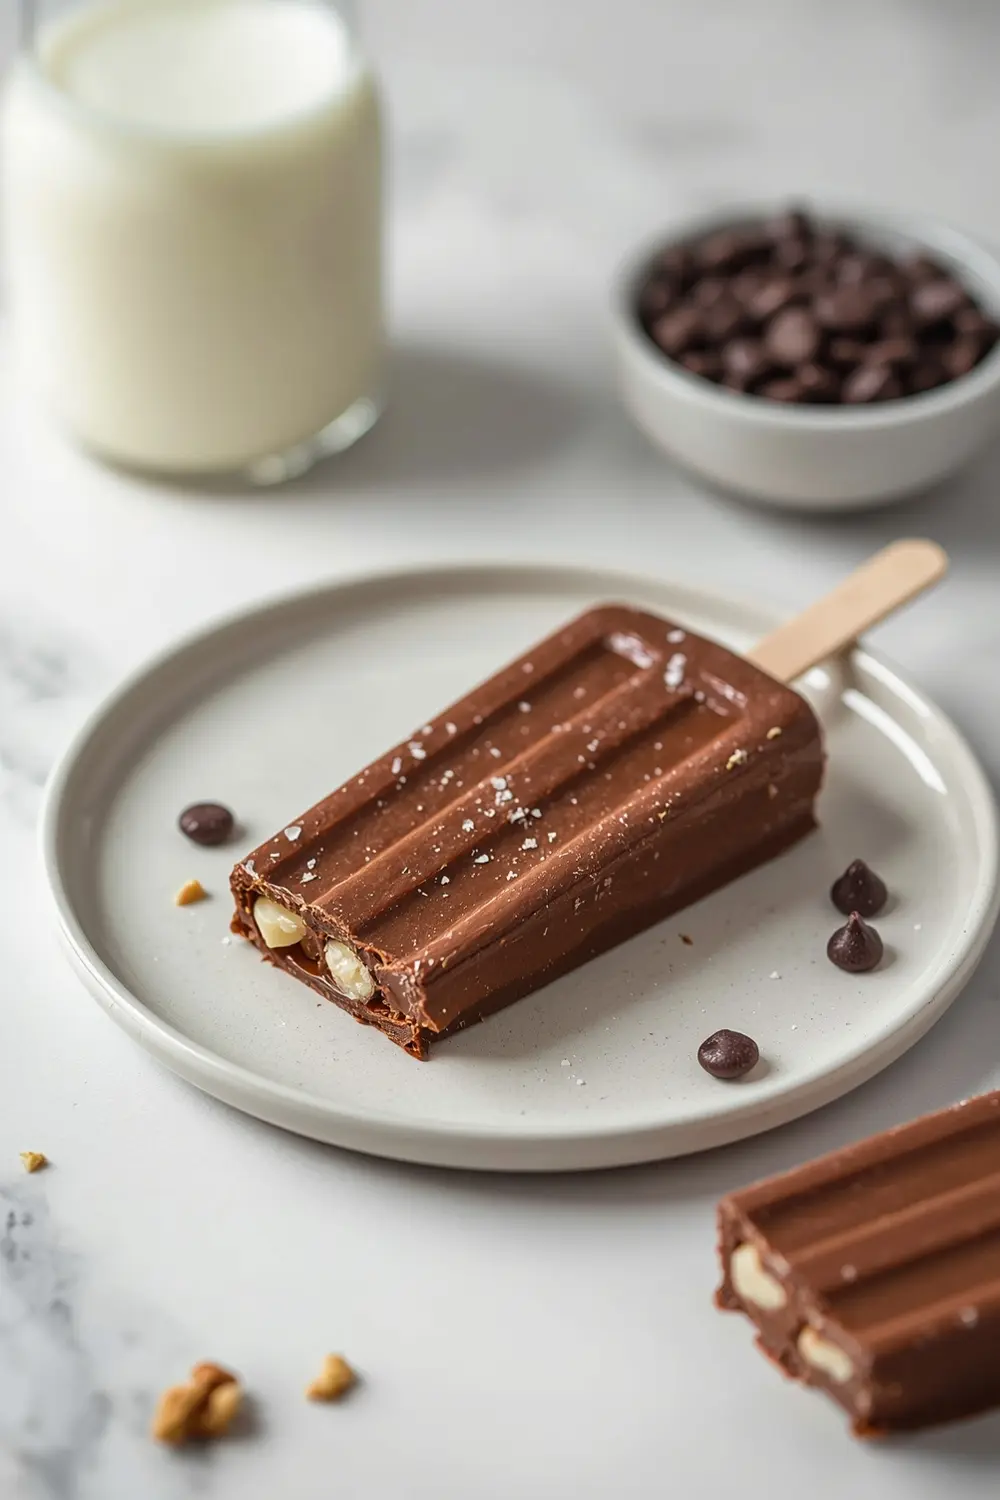
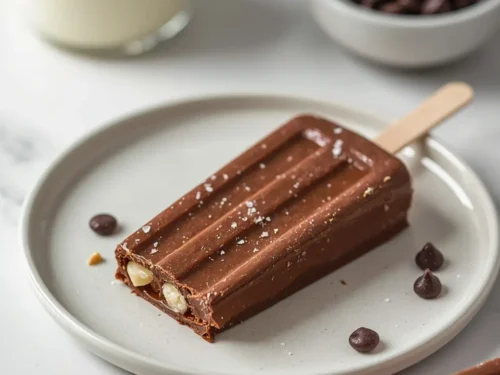
I’m obsessed with making homemade chocolate fudge pops from scratch because store-bought ones just can’t compete. There’s something magical about pulling these creamy frozen treats straight from your freezer on a hot afternoon.
My kids go crazy for these, and honestly, I love how easy they are to make. You’ll have a batch of classic chocolate popsicles ready in under 4 hours (most of that’s freezing time, so you’re hands-off).
Want to become the favorite neighbor or the coolest parent at the pool? Pin this recipe for your next summer gathering.
If you’re already dreaming of frozen desserts, you might also love our collection of easy peach dessert ideas for fresh summer entertaining.
Why this homemade chocolate fudge pops recipe works
Ever wonder why homemade versions taste so much richer than the cardboard box kind? The answer’s simple—real ingredients and zero weird additives. I tested about six different batches before landing on this ratio, and the results are consistently creamy and perfectly fudgy every single time.
- Creamy, luxurious texture that melts on your tongue instead of that waxy feeling
- Made with real cocoa powder and chocolate chips for authentic chocolate flavor
- Ready to freeze in under 15 minutes of active work
- Kid-approved and crowd-pleasing at every summer party
| Prep Time | Cook Time | Calories | Servings | Cuisine |
|---|---|---|---|---|
| 15 minutes | 4 hours | 285 per serving | 10 servings | American |
Ingredients for homemade chocolate fudge pops
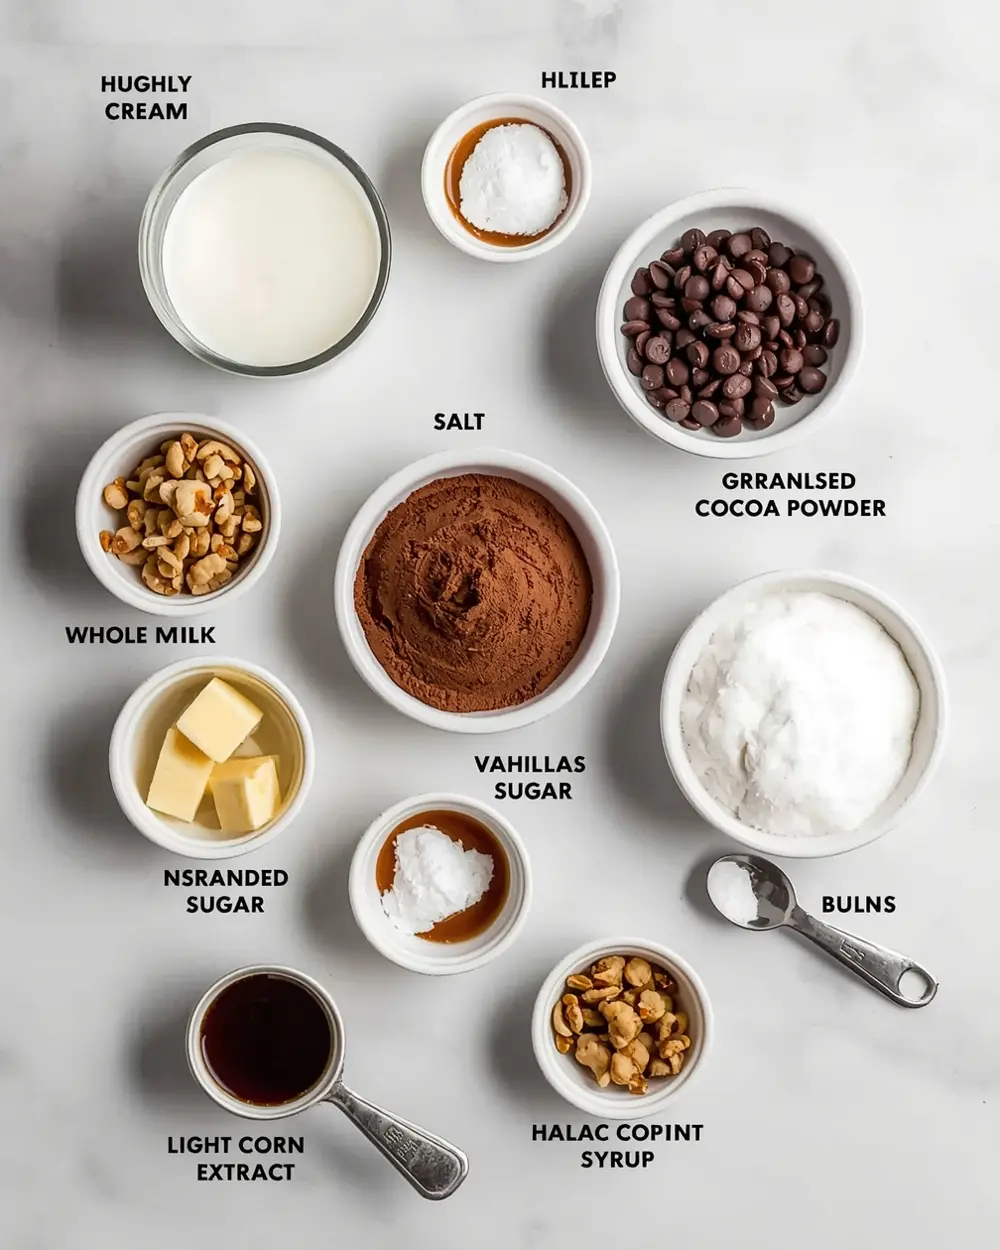
- 2 cups whole milk
- 1 cup heavy cream
- 1/2 cup granulated sugar
- 1/3 cup unsweetened cocoa powder
- 1/4 cup unsalted butter
- 1/2 cup chocolate chips
- 2 tablespoons light corn syrup
- 1/4 teaspoon salt
- 1 teaspoon vanilla extract
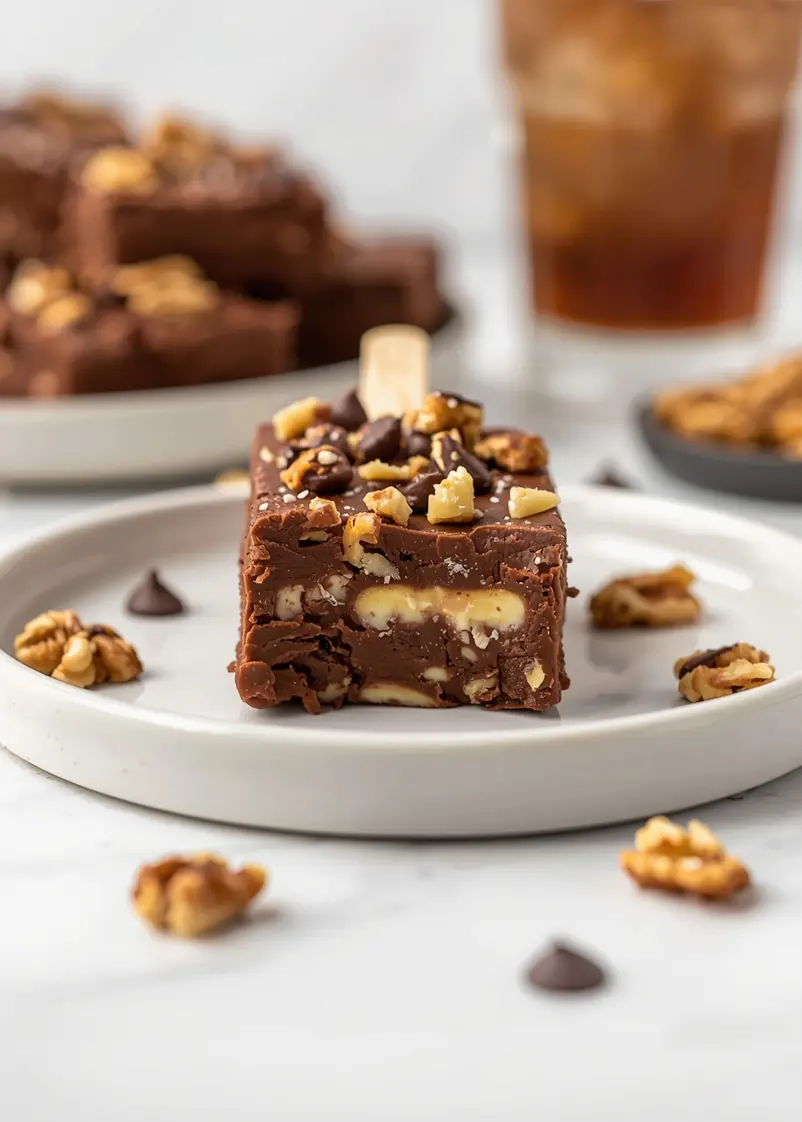
- 1/4 cup chopped walnuts (optional)
The beauty of this homemade chocolate fudge pops base is how flexible it is. You can swap whole milk for oat milk or almond milk without messing up the texture—just know that non-dairy versions freeze slightly firmer.
Don’t skip the corn syrup, even though it seems random. That ingredient keeps these from turning into rock-solid popsicles and gives them that smooth, almost gelato-like consistency. Trust me on this.
Step-by-step instructions
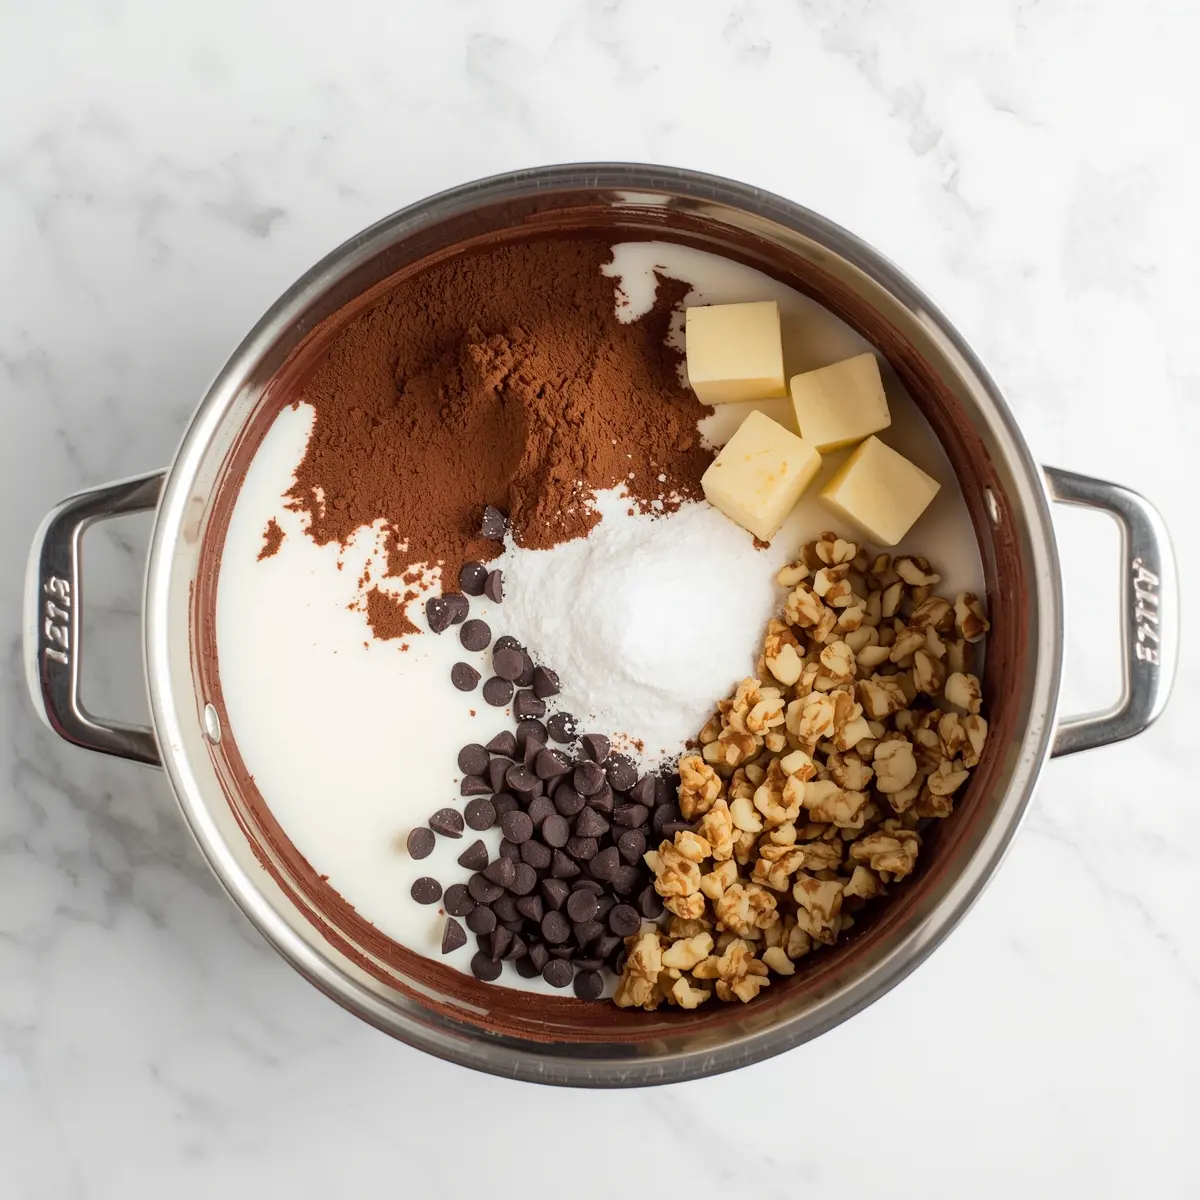
1. Pour 2 cups whole milk and 1 cup heavy cream into a medium saucepan over medium heat. Don’t panic if it looks like a lot—you need this volume for proper texture. Stir occasionally so the bottom doesn’t scorch, which takes about 3-4 minutes until tiny bubbles form around the edges.
2. While the milk heats, whisk together 1/3 cup unsweetened cocoa powder and 1/2 cup granulated sugar in a small bowl. Break up any cocoa lumps with the back of your spoon. This prevents clumpy chocolate flavor when you add it to the hot milk.
3. Once the milk mixture is steaming but not boiling, slowly whisk in your cocoa-sugar mixture. Go slow—I learned this the hard way when I dumped it all at once and had cocoa flying everywhere. Whisk constantly for about 2 minutes until completely smooth.
4. Add 1/4 cup unsalted butter, 1/2 cup chocolate chips, and 2 tablespoons light corn syrup to the saucepan. Stir gently until everything melts together, which happens in about 1-2 minutes. The mixture should look glossy and incredibly chocolatey.
5. Remove from heat and stir in 1/4 teaspoon salt and 1 teaspoon vanilla extract. Let the homemade chocolate fudge pops mixture cool to room temperature for about 15 minutes—don’t skip this step because hot liquid will make your popsicle molds crack.
6. Pour the cooled mixture into your popsicle molds, leaving about 1/4 inch at the top for expansion. Insert sticks if your molds need them. I like to freeze for 45 minutes first so the sticks stay centered before I top off with lids.
7. Freeze for at least 4 hours (overnight is even better). Run warm water over the outside of the molds for 15 seconds to release them easily. You’ll know they’re perfect when they slide out with just a gentle pull.
Serving ideas for homemade chocolate fudge pops
These frozen treats are amazing on their own, but here are my favorite ways to serve them:
Dipped in extra chocolate
Melt 1/2 cup chocolate chips with 1 tablespoon coconut oil, then quickly dip your pop halfway through. Sprinkle with chopped nuts or sprinkles before it hardens. You’ve basically created a fancy party treat that looks like you spent hours on it.Pool party station
Set up a cooler with your homemade chocolate fudge pops alongside some elegant dipped strawberries and chocolate-covered fruit for a complete frozen dessert spread. Everyone will be asking for your secret.Paired with summer cake
Serve these alongside fresh strawberry shortcake on a hot afternoon. The cold chocolate pops complement the lightness of cake perfectly and keep everyone cool without feeling too heavy.Pro tips for perfect homemade chocolate fudge pops
Storage tips
– Keep frozen pops in an airtight container for up to 2 weeks to prevent freezer burn – Wrap individual pops in parchment between layers so they don’t stick together – They melt fast on hot days, so grab them right before eatingMake-ahead instructions
– Mix and freeze the base up to 3 days ahead in a sealed container – Prepare the cocoa-sugar mixture the morning of freezing day – Pop entire molds in the freezer overnight, then unmold and store togetherVariations
– Swirl in 2 tablespoons peanut butter for chocolate-PB version – Add 1/4 teaspoon espresso powder for deeper chocolate flavor – Mix in 1/4 cup chopped almonds directly into the mixture before freezingTroubleshooting
– If pops won’t release from molds, run hot water over outside for 30 seconds longer – If mixture looks separated or grainy, the cocoa powder wasn’t whisked enough at the start – If they’re too hard to bite, thaw at room temperature for 2-3 minutes firstFrequently asked questions
How long can you freeze homemade chocolate fudge pops?
They’ll keep for up to 2 weeks in the freezer. Store them in an airtight container to prevent freezer burn and that weird ice-crystal texture. Beyond 2 weeks, they start developing freezer taste, so I like to eat mine within 10 days for peak flavor.
Can you use different types of milk for this recipe?
Yes, any milk works—whole, 2%, oat, or almond milk. Just know that non-dairy versions freeze slightly firmer because they have different fat content. I’ve made them with regular milk dozens of times, and they’re equally creamy either way (don’t tell anyone I sometimes use the non-dairy option for health reasons).
What if you don’t have popsicle molds?
Small paper cups with popsicle sticks work perfectly fine. Once the mixture freezes, just peel away the paper cup to reveal your pop. It’s honestly my backup method when I can’t find my actual molds, and the result tastes identical.
Can you make this recipe with different chocolate flavors?
Absolutely—swap 1/3 cup cocoa powder for melted white chocolate chips for a vanilla version. You could also add 2 tablespoons of almond extract or 1/4 teaspoon peppermint extract to create fun variations. The homemade chocolate fudge pops base is super adaptable once you nail the original version.
Final thoughts
Real talk—once your friends and family taste these, they’ll be asking for them all summer long. I always make double batches because they disappear faster than I can restock my freezer.
These easy summer frozen treats beat anything you’ll find at the store, plus your kitchen smells amazing while they’re cooking. No weird ingredients, no food coloring, just pure chocolate goodness.
When summer rolls around, you’ll want to have a batch ready. Check out our spring dessert ideas with fresh berry options to round out your frozen treat collection.
Save this recipe now so you’ve got it handy for pool days, barbecues, and those scorching afternoons when nothing else will do!
Classic Homemade Chocolate Fudge Pops – Liz’s Easy Summer Party Treat
Ingredients
Method
- Pour 2 cups whole milk and 1 cup heavy cream into a medium saucepan over medium heat. Don’t panic if it looks like a lot—you need this volume for proper texture. Stir occasionally so the bottom doesn’t scorch, which takes about 3-4 minutes until tiny bubbles form around the edges.
- While the milk heats, whisk together 1/3 cup unsweetened cocoa powder and 1/2 cup granulated sugar in a small bowl. Break up any cocoa lumps with the back of your spoon. This prevents clumpy chocolate flavor when you add it to the hot milk.
- Once the milk mixture is steaming but not boiling, slowly whisk in your cocoa-sugar mixture. Go slow—I learned this the hard way when I dumped it all at once and had cocoa flying everywhere. Whisk constantly for about 2 minutes until completely smooth.
- Add 1/4 cup unsalted butter, 1/2 cup chocolate chips, and 2 tablespoons light corn syrup to the saucepan. Stir gently until everything melts together, which happens in about 1-2 minutes. The mixture should look glossy and incredibly chocolatey.
- Remove from heat and stir in 1/4 teaspoon salt and 1 teaspoon vanilla extract. Let the homemade chocolate fudge pops mixture cool to room temperature for about 15 minutes—don’t skip this step because hot liquid will make your popsicle molds crack.
- Pour the cooled mixture into your popsicle molds, leaving about 1/4 inch at the top for expansion. Insert sticks if your molds need them. I like to freeze for 45 minutes first so the sticks stay centered before I top off with lids.
- Freeze for at least 4 hours (overnight is even better). Run warm water over the outside of the molds for 15 seconds to release them easily. You’ll know they’re perfect when they slide out with just a gentle pull.


")