
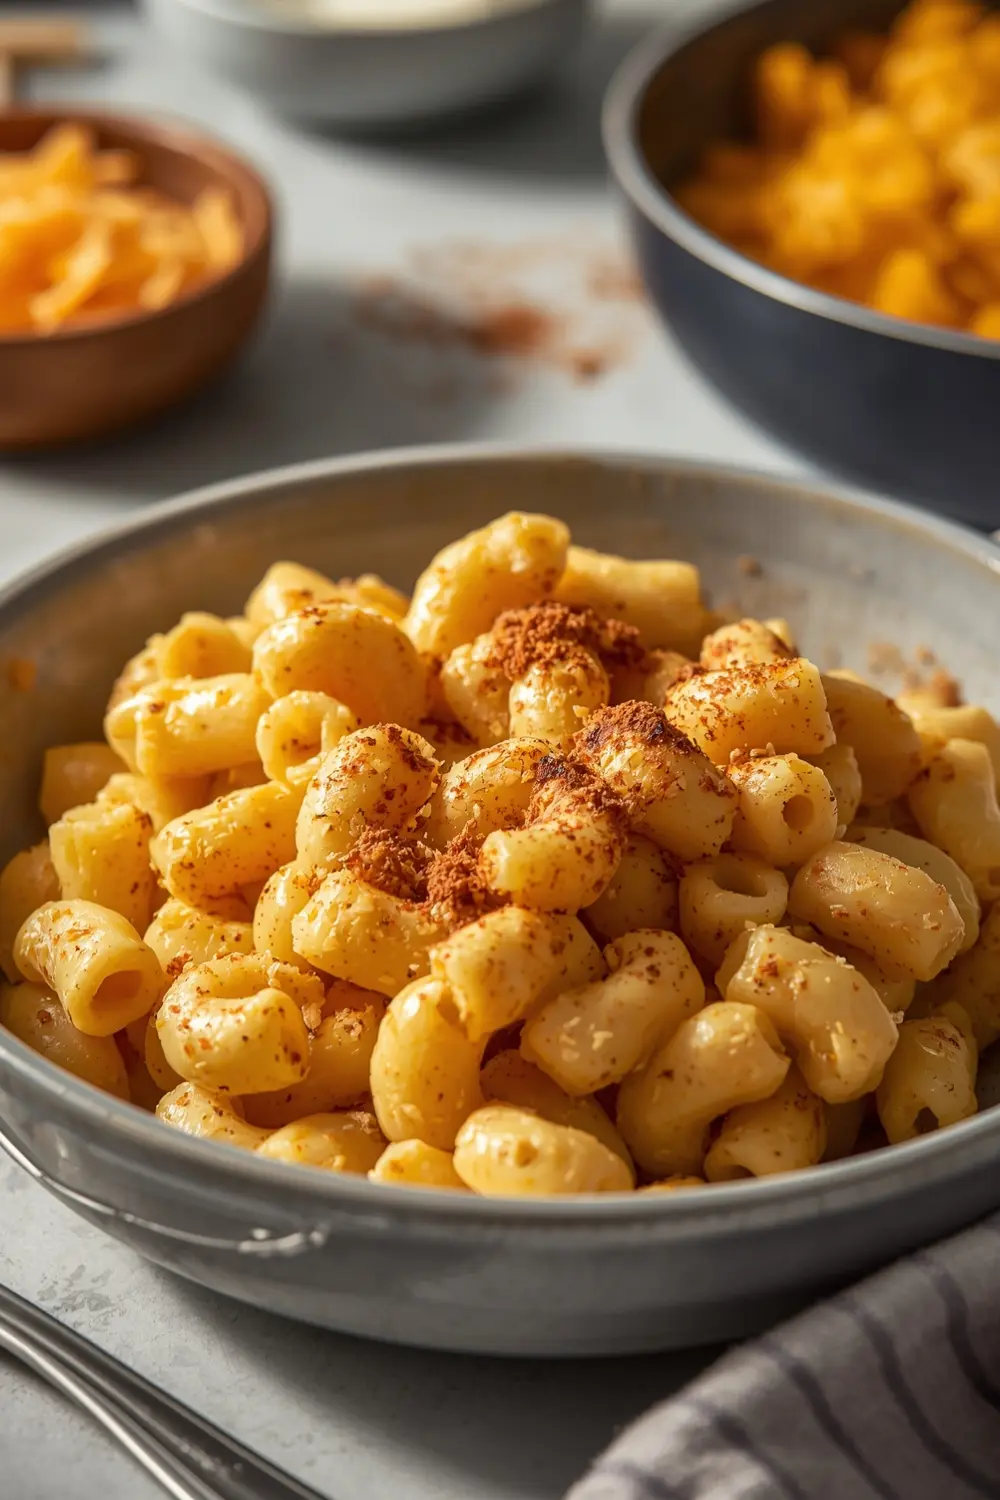
Ever crave that creamy, cheesy pasta dish that makes your whole family actually sit down together? Baked mac and cheese recipe hits different when you get that golden crispy top with the gooey cheese underneath. This isn’t some basic boxed version — it’s the real deal that’ll have everyone asking for seconds.
I’m obsessed with how simple it is to pull off a restaurant-quality result at home. Seriously, if you can boil pasta and make a cheese sauce, you’ve basically got this. Plus, it’s one of those comfort food dinner ideas that works for literally any night of the week.
Bookmark this recipe for those busy weeknights when you need something that feels fancy but takes under 45 minutes total. Trust me, your crew will thank you.
Why this baked mac and cheese recipe works
Know what makes homemade versions taste so much better than the box? Fresh cheese and a proper roux base that actually gets creamy instead of gummy. I’ve made this exact version at least twenty times, and it’s never disappointed me once.
- Creamy sauce made with real cheddar — no weird preservatives, just smooth and rich
- Golden breadcrumb topping — adds that textured crunch that makes it extra special
- Ready in 45 minutes — perfect for busy weeknights and family dinners
- Feeds 8 people — seriously budget-friendly for crowd-pleasing meal prep
| Prep Time | Cook Time | Calories | Servings | Cuisine |
|---|---|---|---|---|
| 15 minutes | 30 minutes | 385 per serving | 8 servings | American |
Ingredients for baked mac and cheese recipe
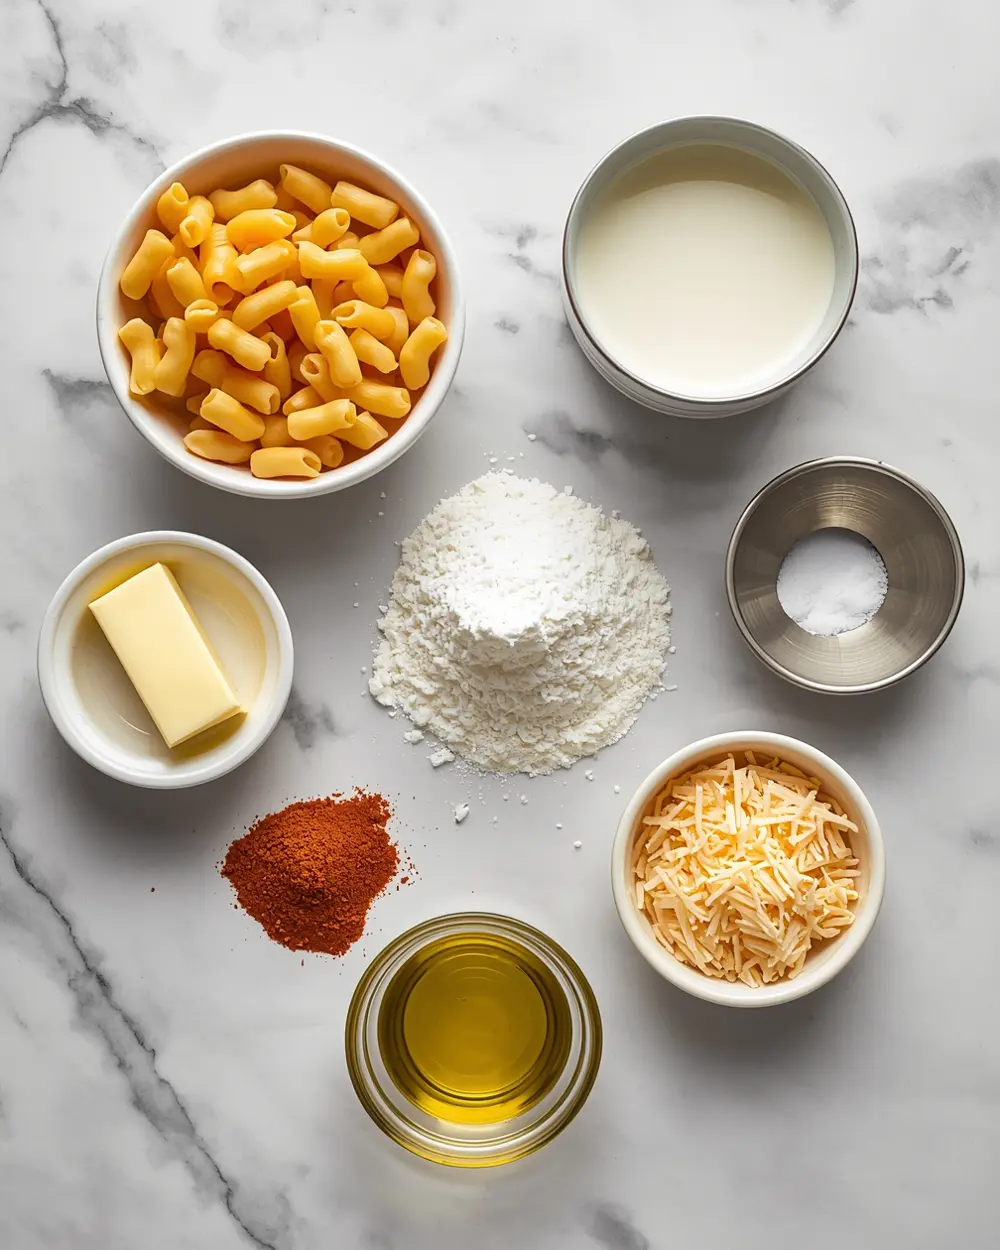
- 2 cups elbow macaroni
- 2 tbsp butter
- 2 tbsp all-purpose flour
- 2 cups whole milk
- 1 1/2 cups shredded cheddar cheese
- 1/2 tsp salt
- 1/4 tsp black pepper
- 1/4 tsp paprika
- 1 cup panko breadcrumbs
- 2 tbsp melted butter
- 1/2 tsp garlic powder
- 1 tbsp olive oil
Honestly, the cheddar is where you don’t want to cut corners on this baked mac and cheese. I’ve tried the pre-shredded kind and it never gets as smooth and silky as freshly shredded cheese from a block.
If you’re out of cheddar, try mixing in gruyere or a sharp white cheddar for extra flavor depth. Don’t skip the panko topping either — it’s what gives you that golden crust that makes people go “wow” when they see it.
Step-by-step instructions
1. Preheat your oven to 350°F. Bring a large pot of salted water to a boil and cook the elbow macaroni for about 2 minutes less than the package says — you want it slightly underdone since it’ll keep cooking in the oven. Drain it in a colander but don’t rinse it (the starch helps the cheese sauce cling). Set aside.
2. In the same pot, melt 2 tbsp butter over medium heat. Once it’s foaming, sprinkle in the flour and whisk constantly for about 2 minutes to create a roux. You’ll see it start to smell a little toasty — that’s exactly what you want and means it’s ready for the milk.
3. Slowly pour in the whole milk while whisking constantly to avoid lumps forming. Keep stirring and let it bubble gently for 3-4 minutes until the sauce thickens enough to coat the back of a spoon. This is where patience pays off — if you rush, you’ll get a lumpy mess (trust me, I’ve been there).
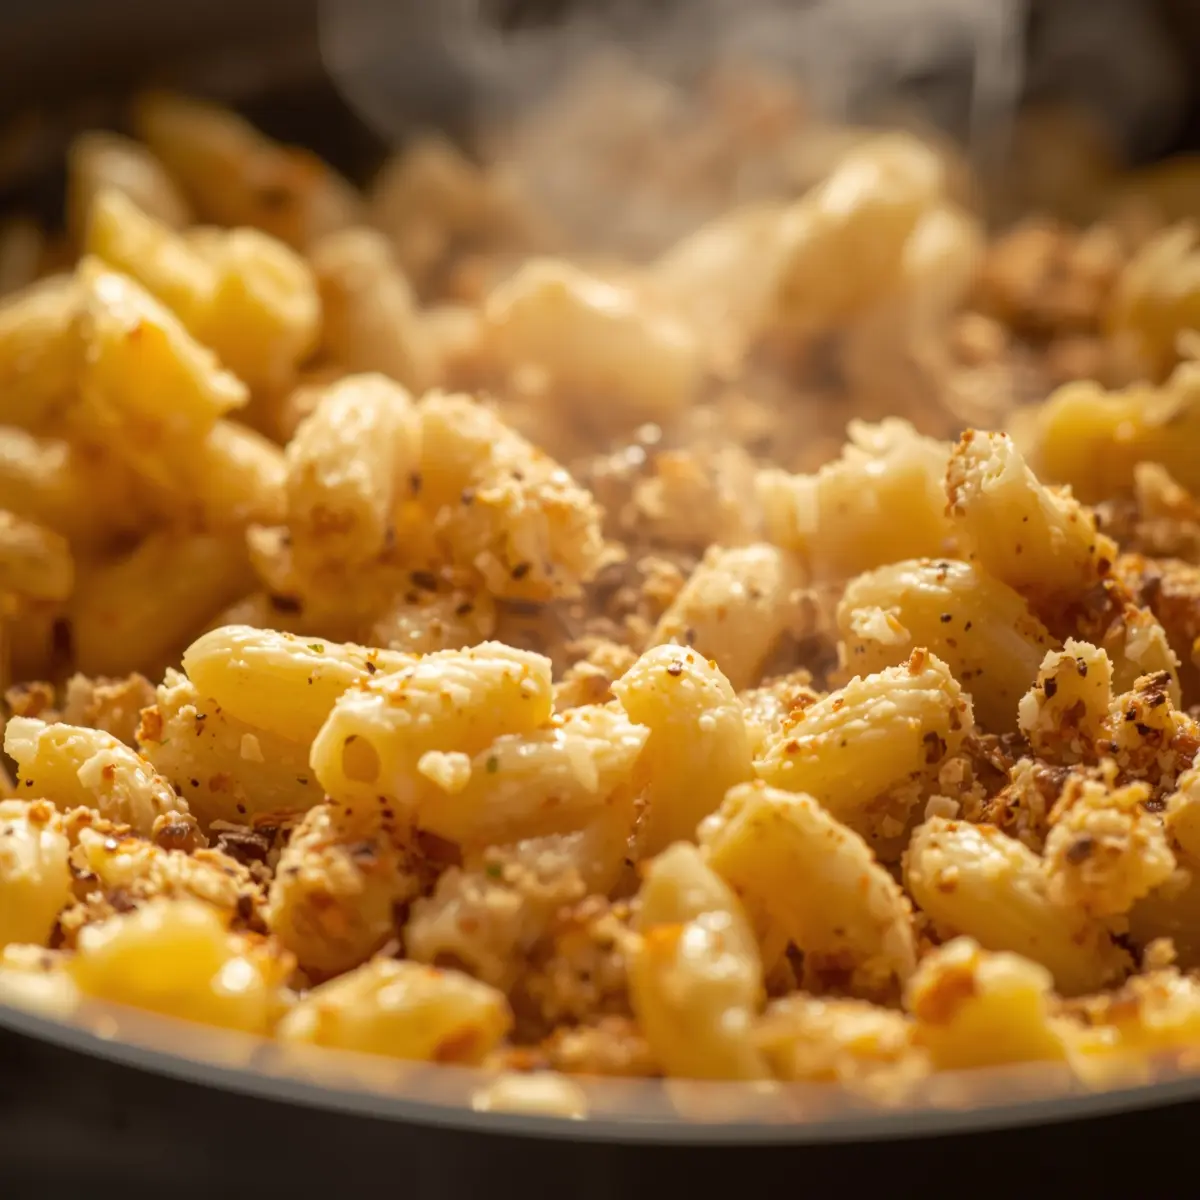
4. Remove the pot from heat and stir in the shredded cheddar cheese, salt, black pepper, and paprika. Fold in the cooked pasta gently until every piece gets coated with that creamy sauce. The mixture should be thick but not dry — if it looks too stiff, splash in a little milk.
5. Pour the mac and cheese into a buttered 9×13 baking dish, spreading it evenly. The baked mac and cheese should fill the dish about three-quarters full so the topping doesn’t spill over in the oven.
6. Mix the panko breadcrumbs with the melted butter, garlic powder, and a pinch of salt in a small bowl. Sprinkle this mixture evenly across the top of the mac — don’t pack it down or it’ll get dense and soggy. The loose, buttery breadcrumbs are what create that golden, crunchy finish.
7. Bake for 25-30 minutes until the top turns golden brown and you can see the cheese bubbling around the edges. Let it rest for 5 minutes before serving so it’s not molten lava on the inside. My family always burns their mouths trying to eat it immediately, so trust me on the cooling time!
Serving ideas for baked mac and cheese recipe
This creamy pasta bake deserves sides that complement its richness without competing.
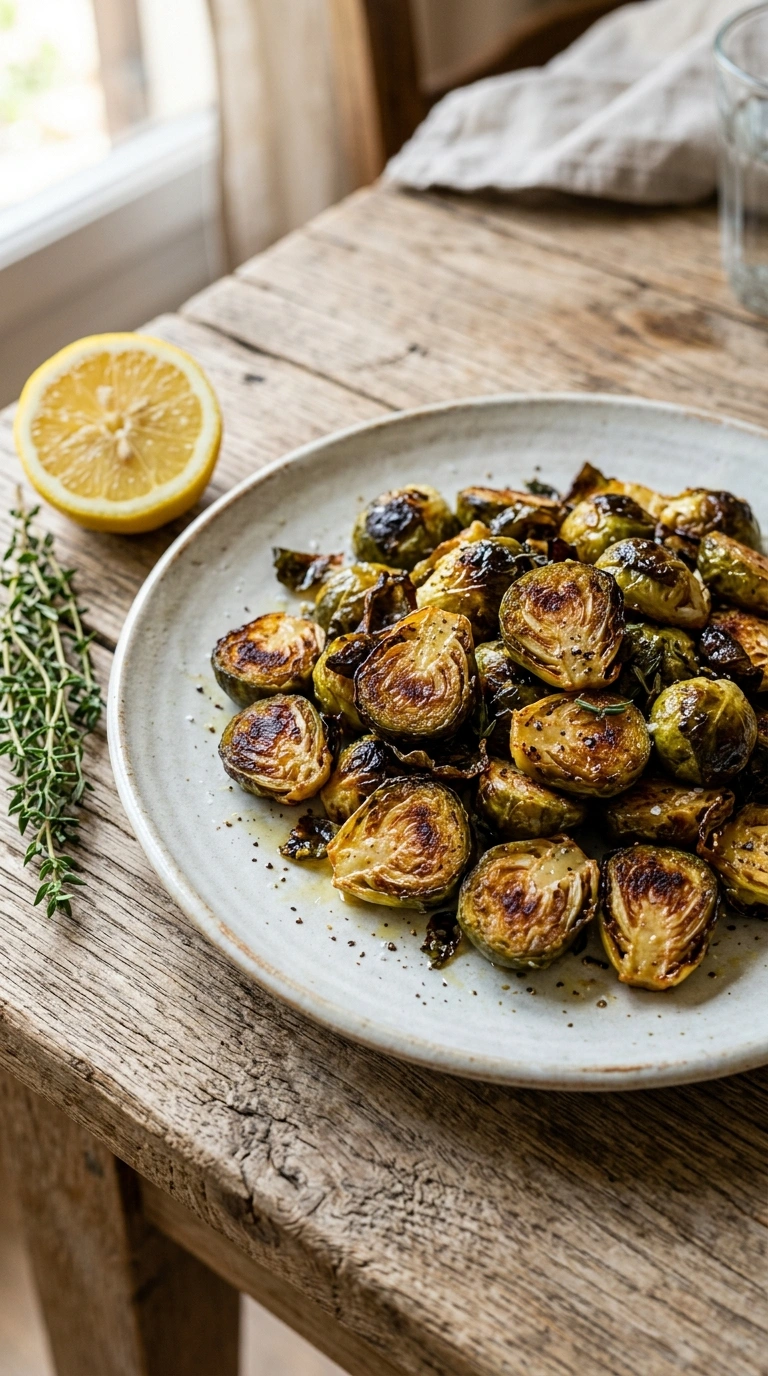
Roasted Green Beans
Crispy roasted green beans with garlic cut through the creaminess and add a fresh veggie element. Toss them with olive oil and salt, roast at 400°F for 15 minutes, and you’ve got the perfect light contrast. My kids actually eat vegetables when I serve them this way.Simple Green Salad
A tart vinaigrette on mixed greens is your best friend next to this dish. The acid balances out all that cheesy goodness and prevents you from feeling too full. Kid favorite dinner combos work best when you add something crisp and bright.Garlic Bread
Because sometimes you gotta lean into comfort and go all in with a carby side. Slice a loaf lengthwise, brush with garlic butter, toast it until crispy, and watch it disappear. Honestly, this combo is what family dinner memories are made of.Pro tips for perfect baked mac and cheese recipe
Storage tips
– Keep leftovers in an airtight container for up to 4 days in the fridge – The golden crust softens after day one, but the flavor actually improves – Freeze unbaked mac and cheese for up to 3 months (add 10 extra minutes baking time)Make-ahead instructions
– Assemble the entire baked mac and cheese in your baking dish, cover, and refrigerate overnight – Bring to room temperature for 15 minutes before baking so it cooks evenly throughout – You can also freeze it right in the baking dish, then pop it straight into the ovenVariations
– Swap half the cheddar for smoked cheddar or add crispy turkey strips for extra protein – Stir in crispy fried onions instead of panko for a completely different texture and flavor – Mix a beaten egg into the sauce for an even creamier, almost custard-like consistencyTroubleshooting
– If the sauce breaks or gets grainy, you likely overheated it — try whisking in cold milk slowly – Sauce too thin? Cook it longer on medium heat to reduce, or make a slurry of cornstarch and water – Breadcrumb topping burning before the inside cooks? Cover with foil for the first 15 minutesFrequently asked questions
Can you freeze baked mac and cheese?
Yes, absolutely — freeze it unbaked in your baking dish for up to 3 months, or bake it first and freeze leftovers in an airtight container for up to 3 months either way. Either method works great, though I prefer freezing it raw because you get that fresh-baked golden top. Just add 10-15 extra minutes to the baking time if it goes straight from freezer to oven.What cheese works best in this recipe?
Sharp cheddar gives the best flavor, but you can mix in gruyere, smoked cheddar, or even a little parmesan for depth. The key is using freshly shredded cheese from a block instead of pre-shredded, since the anti-caking powder prevents it from melting smoothly. I’ve tried fancy combinations, but honestly, good quality sharp cheddar alone does the job beautifully.How do you reheat leftover baked mac and cheese?
Reheat it covered at *350°F* for about 15-20 minutes until it’s warm all the way through, stirring gently halfway. If the top is already golden and you don’t want it getting darker, cover with foil for the whole time. You can also microwave individual portions for 90 seconds, though the oven method keeps the texture way better and the crust stays crispy.Is this a kid-friendly dinner option?
Totally — this creamy pasta bake is basically the ultimate kid favorite dinner that actually gets eaten. Most kids go crazy for the cheesy sauce and golden breadcrumb top, plus there’s nothing weird or spicy about it. My 6-year-old ate three helpings last Tuesday, which tells you everything you need to know.Final thoughts
This baked mac and cheese recipe is the kind of comfort food that makes weeknights feel special without the stress. The golden crust with creamy cheese underneath is what keeps people coming back for this version over every other one.
It’s become a staple in our rotation because it’s reliable, budget-friendly, and honestly makes me look like a better cook than I actually am. Seriously, save this for later so you have it ready when you need an easy win in the kitchen.
Your family’s gonna devour it, and family dinner recipes don’t get much easier or more satisfying than this. Go ahead and make it this week — I promise you won’t regret it.

Baked Mac and Cheese With a Golden Crust
Ingredients
Method
- Preheat your oven to 350°F. Bring a large pot of salted water to a boil and cook the elbow macaroni for about 2 minutes less than the package says — you want it slightly underdone since it’ll keep cooking in the oven. Drain it in a colander but don’t rinse it (the starch helps the cheese sauce cling). Set aside.
- In the same pot, melt 2 tbsp butter over medium heat. Once it’s foaming, sprinkle in the flour and whisk constantly for about 2 minutes to create a roux. You’ll see it start to smell a little toasty — that’s exactly what you want and means it’s ready for the milk.
- Slowly pour in the whole milk while whisking constantly to avoid lumps forming. Keep stirring and let it bubble gently for 3-4 minutes until the sauce thickens enough to coat the back of a spoon. This is where patience pays off — if you rush, you’ll get a lumpy mess (trust me, I’ve been there).
- Remove the pot from heat and stir in the shredded cheddar cheese, salt, black pepper, and paprika. Fold in the cooked pasta gently until every piece gets coated with that creamy sauce. The mixture should be thick but not dry — if it looks too stiff, splash in a little milk.
- Pour the mac and cheese into a buttered 9×13 baking dish, spreading it evenly. The baked mac and cheese should fill the dish about three-quarters full so the topping doesn’t spill over in the oven.
- Mix the panko breadcrumbs with the melted butter, garlic powder, and a pinch of salt in a small bowl. Sprinkle this mixture evenly across the top of the mac — don’t pack it down or it’ll get dense and soggy. The loose, buttery breadcrumbs are what create that golden, crunchy finish.
- Bake for 25-30 minutes until the top turns golden brown and you can see the cheese bubbling around the edges. Let it rest for 5 minutes before serving so it’s not molten lava on the inside. My family always burns their mouths trying to eat it immediately, so trust me on the cooling time!


")