
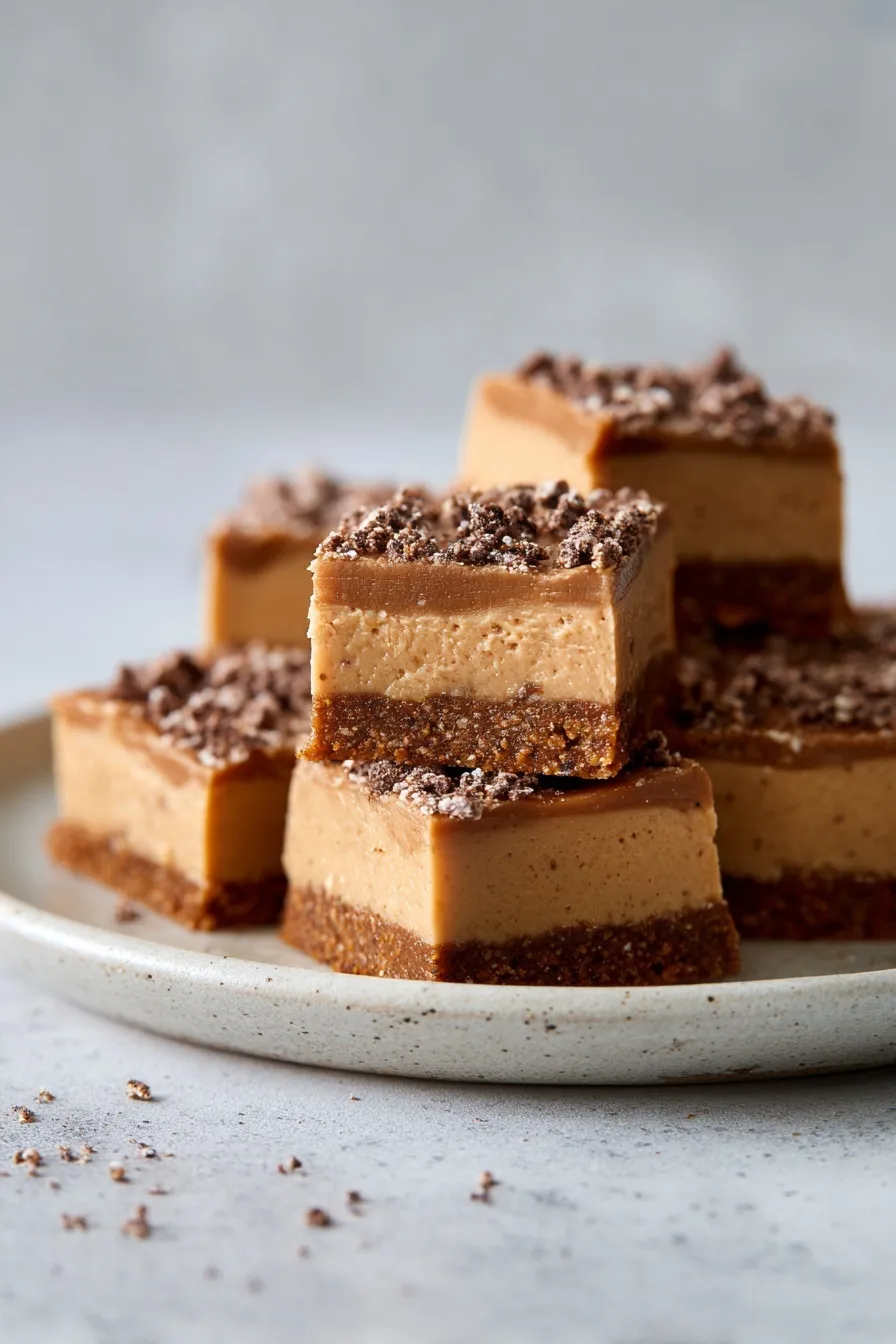
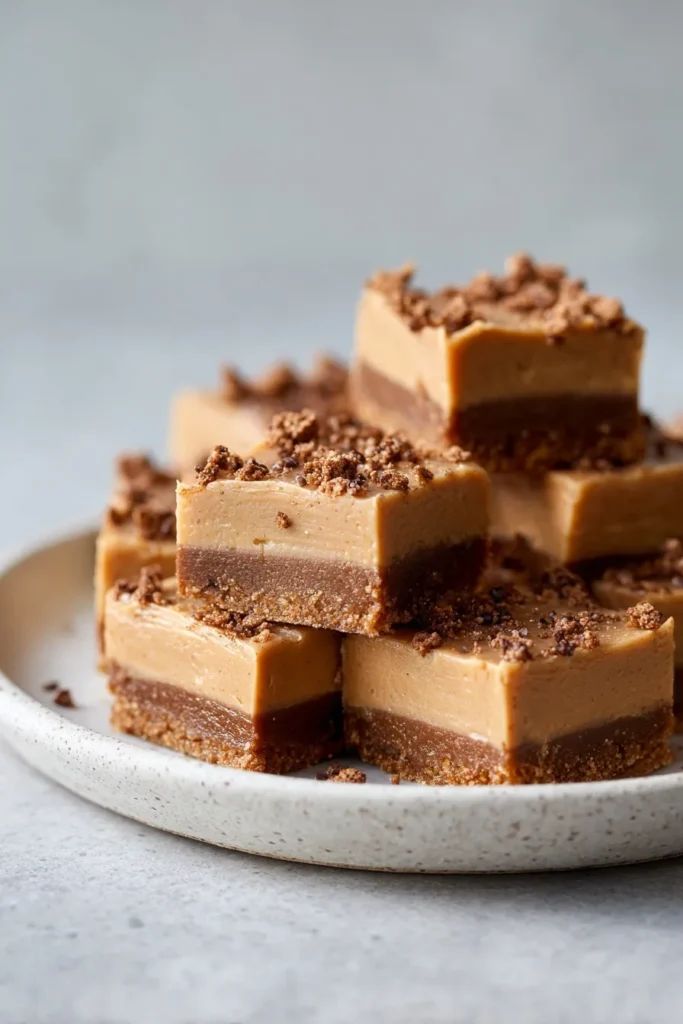
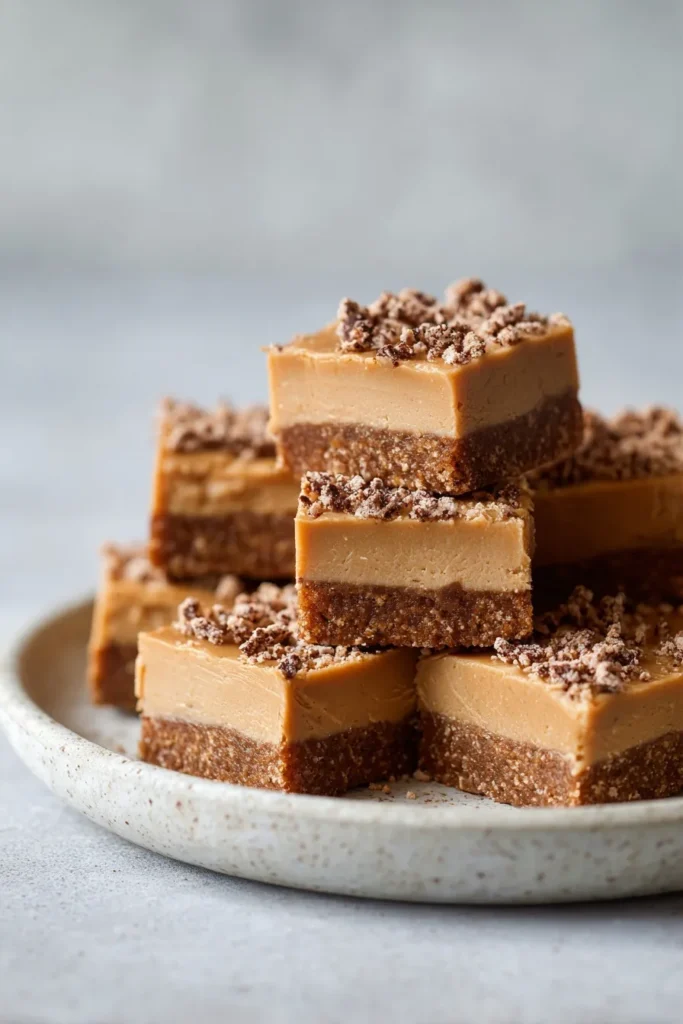
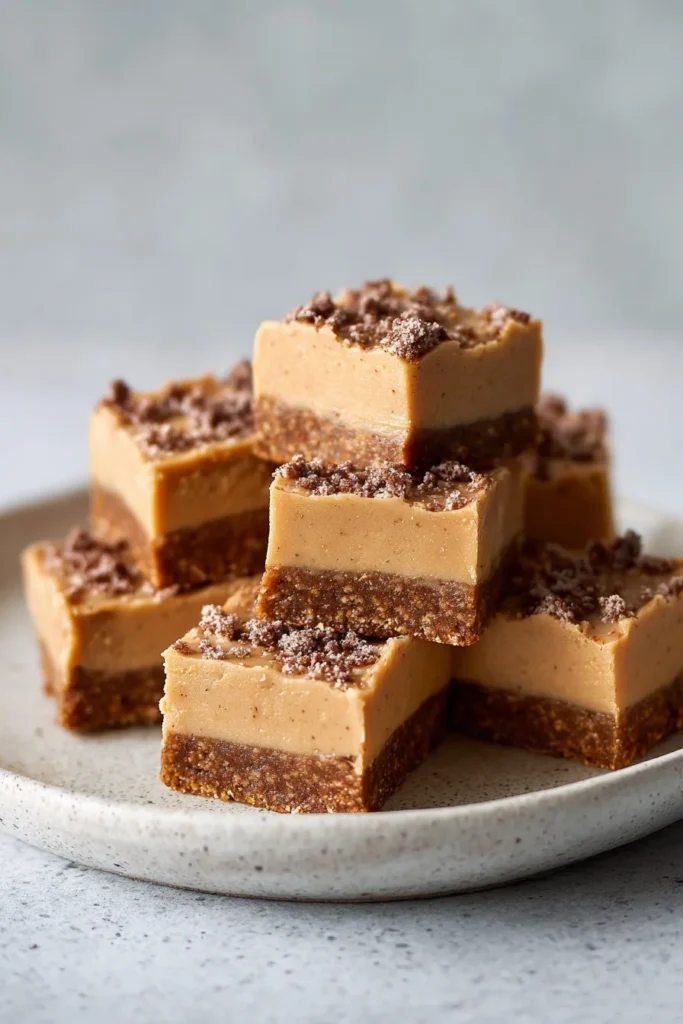
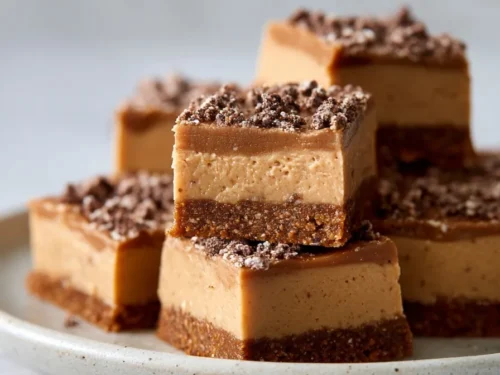
Craving rich, creamy fudge without the candy thermometer hassle? This Biscoff fudge recipe combines caramelized cookie butter with white chocolate in just 15 minutes. Smooth, spiced, and impossibly easy—exactly what holiday gift-giving needs.
Why This Biscoff Fudge Recipe Works
Ever notice how the best fudge recipes balance creamy texture with bold flavor perfectly? This easy Biscoff fudge creates that combination using simple stovetop techniques.
The magic happens when sweetened condensed milk binds white chocolate and cookie butter into smooth, sliceable fudge. You’re getting bakery-quality confections without candy thermometers or complicated techniques—just stir, chill, and slice this addictive treat.
Here’s what makes this recipe foolproof:
- No candy thermometer needed so anyone can make perfect fudge without special equipment
- Ready in 15 minutes of active time plus chilling—no hours of stirring required
- Cookie butter creates flavor that tastes gourmet without complicated layering or swirling
- White chocolate base stays creamy and smooth instead of grainy like some fudge recipes
Ingredients
Ready to make gift-worthy fudge that looks professional without complicated candy-making? This best Biscoff fudge uses just a handful of ingredients.
For the fudge:
- ½ cup unsalted butter (1 stick)
- 1 (14 oz) can sweetened condensed milk
- 2 cups white chocolate chips (340g)
- 1 cup smooth Biscoff cookie butter (250g)
- 1 teaspoon pure vanilla extract (alcohol-free)
- ¼ teaspoon salt
For topping:
- 10-12 Biscoff cookies, crushed
- Sea salt flakes (optional)
The combination of white chocolate and cookie butter creates incredible richness without being too sweet. Sweetened condensed milk ensures creamy texture that sets perfectly every time without crystallization issues.
Step-by-Step Instructions
1. Line baking pan with parchment paper in an 8×8 inch square pan, leaving overhang on two sides. The overhang creates handles for easy lifting after fudge sets. Press parchment firmly into corners.
2. Melt butter and milk in a heavy-bottomed saucepan over medium-low heat, stirring constantly. Cook for 3-5 minutes until completely smooth and combined. Don’t rush this step or mixture might separate.
3. Add white chocolate chips to the warm butter mixture and reduce heat to low. Stir constantly for 5-7 minutes until chips melt completely. Scrape bottom and sides frequently to prevent scorching.
4. Remove from heat immediately once chocolate melts fully to prevent overcooking. The residual heat continues cooking, so timing here is crucial for smooth texture.
5. Stir in cookie butter along with vanilla extract and salt while mixture is still hot. Mix vigorously until completely smooth and uniform in color. No streaks should remain.
6. Pour into prepared pan immediately before mixture cools and thickens. Use a spatula to scrape every bit from the saucepan. Spread evenly into corners and smooth the top.
7. Crush Biscoff cookies by placing them in a zip-top bag and crushing with a rolling pin. Create a mix of fine crumbs and larger pieces for textural interest.
8. Sprinkle cookie crumbs generously over warm fudge surface while it’s still soft. Press down gently with the back of a spatula so they adhere as fudge sets.
9. Refrigerate for minimum 2-3 hours or preferably overnight until completely firm and sliceable. Don’t try cutting too early or fudge will be too soft and sticky.
10. Cut into squares by lifting fudge out using parchment handles. Use a sharp knife dipped in hot water and wiped dry between cuts for clean edges. Cut into 1-inch squares.
Essential Equipment
Heavy-Bottomed Saucepan (2-3 Quart)
A thick bottom distributes heat evenly and prevents hot spots that burn chocolate. Non-stick coating helps but isn’t necessary if you stir constantly and scrape the bottom.
8×8 Inch Square Baking Pan
Metal pans work best for even chilling throughout the fudge layer. The square shape creates perfect uniform pieces that look professional on gift trays.
Parchment Paper with Overhang
Lining the pan completely and leaving handles makes lifting set fudge foolproof. This prevents breaking edges or struggling to remove stuck pieces from the pan.
Silicone Spatula (PREMIUM)
Heat-resistant silicone scrapes every bit of fudge from the pan without scratching. The flexible edge gets into corners better than wooden spoons for complete mixing.
What to Serve With Biscoff Fudge
Want to turn this homemade Biscoff fudge into a complete dessert experience? These pairings complement the sweet, spiced flavors beautifully.
Strong black coffee or espresso cuts through the richness perfectly and enhances caramel notes. The bitter coffee flavor balances sweet fudge beautifully for sophisticated pairing.
Vanilla ice cream served alongside room-temperature fudge creates incredible contrast. The cold, creamy ice cream melts slightly into rich fudge for decadent dessert.
Fresh strawberries or raspberries provide tart contrast to sweet, buttery fudge. Bright fruit cuts through richness and adds color to dessert platters.
Hot chocolate or chai tea echoes the warm spices in Biscoff cookies. The cozy beverage pairing makes this perfect for winter holiday gatherings.
Storage and Reheating Guide
Refrigerator storage
Store fudge pieces in an airtight container in the refrigerator for up to 2 weeks. Layer parchment paper between stacks to prevent sticking. The texture stays perfectly firm when chilled properly.
Freezer storage
Freeze individually wrapped pieces or entire batch in airtight container for up to 3 months. Thaw in refrigerator overnight before serving. The texture remains creamy and smooth after freezing.
Serving instructions
Serve fudge straight from the refrigerator for firm texture or at room temperature for softer, creamier bite. Let sit for 10-15 minutes at room temperature before serving for best flavor and texture.
Biscoff Fudge Recipe Variations
Ready to customize this best Biscoff cookie butter fudge? These simple swaps create completely different flavor profiles using the same base.
Chocolate swirl version reserves 2 tablespoons cookie butter and swirls it into fudge after pouring into pan. Use a knife to create marble pattern. The visual effect looks impressive and creates flavor pockets.
Sea salt caramel style sprinkles flaky sea salt over top along with crushed cookies before chilling. The salty-sweet combination enhances caramel notes. Use high-quality finishing salt for best flavor.
Dark chocolate drizzle melts ½ cup dark chocolate chips and drizzles over set fudge before cutting. The bitter chocolate contrasts beautifully with sweet cookie butter. Let chocolate set before slicing.
Pro Tips & Tricks
Want this easy Biscoff fudge to turn out smooth and creamy every time? These techniques make all the difference.
Use medium-low heat throughout cooking to prevent scorching white chocolate which burns easily and turns grainy.
Stir constantly especially when melting white chocolate because it seizes quickly if overheated or left unattended.
Work quickly after adding cookie butter because fudge thickens rapidly as it cools and becomes difficult to spread.
Press cookie topping firmly into warm fudge surface so pieces don’t fall off when cutting and serving.
Chill completely before cutting for at least 3 hours or fudge will be too soft and won’t hold square shapes.
Dip knife in hot water between cuts and wipe clean for perfectly smooth edges that look bakery-professional.
Frequently Asked Questions
Can you make Biscoff fudge recipe without white chocolate?
White chocolate is essential for texture and flavor in this recipe. Milk or dark chocolate creates completely different taste and won’t complement cookie butter as well. Stick with white chocolate for authentic Biscoff fudge flavor.
What if you don’t have Biscoff cookie butter?
Smooth Biscoff spread (also called Speculoos spread) is essential for authentic flavor. Regular peanut butter or almond butter taste completely different. Most grocery stores carry Biscoff near peanut butter—don’t substitute.
Why is my fudge grainy instead of smooth?
Grainy texture means white chocolate overheated or was stirred too vigorously while melting. Use low heat and stir gently but constantly. High-quality white chocolate chips melt smoother than cheap brands.
Can you use crunchy Biscoff spread?
Smooth cookie butter works best for silky fudge texture. Crunchy spread adds nice texture but makes the fudge less smooth overall. If using crunchy, expect slightly different consistency throughout.
How do you prevent fudge from being too soft?
Make sure fudge chills for full 3 hours minimum before cutting. Using the right ratio of ingredients and cooking to proper temperature ensures firm texture. If too soft, return to fridge for another hour.
Can you double this Biscoff fudge recipe?
Yes! Use a 9×13 inch pan for doubled batch and increase chilling time to 4 hours minimum. Everything else stays the same—just make sure your saucepan is large enough for double ingredients.
Why You’ll Love This Recipe
Ready to make holiday gifts that actually impress without spending hours in the kitchen? This Biscoff fudge delivers rich, creamy confections in just 15 minutes of work.
You’ll love how the cookie butter creates gourmet flavor effortlessly. The smooth texture melts in your mouth without being too sweet.
Try this easy Biscoff fudge this weekend and discover your new favorite homemade gift.
📌 Save this Biscoff fudge recipe for holiday gifting—it’s guaranteed to be everyone’s favorite treat!
Biscoff Fudge Recipe (3 Ingredients!)
Ingredients
Method
- Line baking pan with parchment paper in an 8×8 inch square pan, leaving overhang on two sides. The overhang creates handles for easy lifting after fudge sets. Press parchment firmly into corners.
- Melt butter and milk in a heavy-bottomed saucepan over medium-low heat, stirring constantly. Cook for 3-5 minutes until completely smooth and combined. Don’t rush this step or mixture might separate.
- Add white chocolate chips to the warm butter mixture and reduce heat to low. Stir constantly for 5-7 minutes until chips melt completely. Scrape bottom and sides frequently to prevent scorching.
- Remove from heat immediately once chocolate melts fully to prevent overcooking. The residual heat continues cooking, so timing here is crucial for smooth texture.
- Stir in cookie butter along with vanilla extract and salt while mixture is still hot. Mix vigorously until completely smooth and uniform in color. No streaks should remain.
- Pour into prepared pan immediately before mixture cools and thickens. Use a spatula to scrape every bit from the saucepan. Spread evenly into corners and smooth the top.
- Crush Biscoff cookies by placing them in a zip-top bag and crushing with a rolling pin. Create a mix of fine crumbs and larger pieces for textural interest.
- Sprinkle cookie crumbs generously over warm fudge surface while it’s still soft. Press down gently with the back of a spatula so they adhere as fudge sets.
- Refrigerate for minimum 2-3 hours or preferably overnight until completely firm and sliceable. Don’t try cutting too early or fudge will be too soft and sticky.
- Cut into squares by lifting fudge out using parchment handles. Use a sharp knife dipped in hot water and wiped dry between cuts for clean edges. Cut into 1-inch squares.


")