Beautiful Patriotic Rice Krispie Treats - Liz's Easy 4th of July Party Dessert
Patriotic rice krispie treats elevate any occasion, bringing vibrant energy and delicious taste. Discover easy summer treats and no bake party desserts with ...
Ingredients
Method
- Melt the butter in a large pot over medium heat, then add your marshmallows once the butter's melted and foamy. Stir constantly for about two minutes until everything's smooth and combined—don't walk away or it'll stick to the bottom. You want that creamy marshmallow mixture before you add anything else.
- Add the salt and stir it through the marshmallow mixture really well, making sure it's fully incorporated. This is when your kitchen's gonna smell absolutely incredible, so take a second to appreciate it. Now remove the pot from heat because you're almost done with the cooking part.
- Pour the rice krispies cereal into the marshmallow mixture and fold it in gently using a rubber spatula. Work quickly here because the marshmallow sets fast once it cools slightly—you want everything coated but not overworked. If it feels too thick, that's perfect; if it seems super sticky, you're good too.
- Spread the mixture into a greased 9x13 inch baking pan and press it down gently with buttered hands or the spatula. Don't compress it too hard or you'll end up with dense, chewy patriotic rice krispie treats instead of that light, crispy texture. Let it cool for about five minutes before decorating.
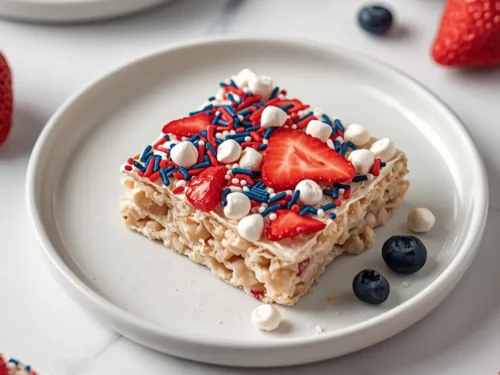
- While it's still slightly warm, sprinkle your red sprinkles across one-third of the mixture, then the white sprinkles on the middle third, and finally the blue sprinkles on the last third. Press them down a little so they stick to the warm marshmallow surface—trust me on this step. The warmth really helps everything adhere perfectly.
- Scatter your white chocolate chips and freeze-dried berries over the top in a random pattern, focusing them on their matching color sections if you want that cohesive look. I personally think the berry placement adds such a nice visual element that makes these feel extra special. Don't stress about perfection here; rustic always looks homemade and delicious.
- Let everything cool completely at room temperature for about thirty minutes, then cut into 16 squares using a buttered knife. Wipe your knife between cuts if pieces stick—this prevents that annoying dragging that ruins your presentation. Store in an airtight container and enjoy your gorgeous no bake party dessert.