Rice Krispie Treats Gooey Crunchy and Classic
rice krispie treats offer easy no bake dessert solutions, perfect for quick family meals or kid-friendly gatherings. Try our simplest recipes now!
Ingredients
Method
- Melt your butter in a large pot over medium heat — don't let it brown or you'll get a different flavor. Once it's totally melted and foamy, add your marshmallows and honey. Stir constantly for about 2-3 minutes until everything combines into a smooth, sticky mixture. You'll smell that sweet vanilla-marshmallow scent filling your kitchen, which is honestly the best part.
- Pour in your vanilla extract and salt, then give it one more good stir. Keep the heat medium — don't crank it to high or the marshmallows will burn on the bottom and taste bitter. Taste it real quick (careful, it's hot!) and adjust the salt if you want.
- Turn off the heat and immediately dump in your Rice Krispies cereal. Use a rubber spatula or wooden spoon to fold everything together gently for about 1 minute. You want every kernel coated in that marshmallow mixture, but don't overmix or you'll crush all the crispiness out of them.
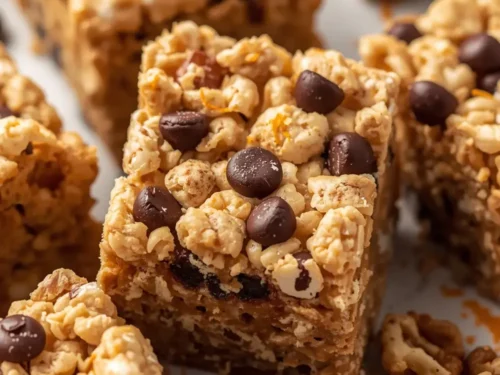
- Fold in your chocolate chips, walnuts, coconut, and orange zest while the mixture's still warm. The chocolate will soften a bit and coat everything beautifully — that's exactly what you want. This is honestly where the magic happens because the flavors get all cozy together.
- Grab a 9x9 baking pan and spray it lightly with cooking spray (trust me on this step). Pour your entire mixture into the pan immediately before it cools down and gets stiff. Use your spatula to press everything flat and even, but don't squash it too hard or you'll lose that crispy texture.
- Let it cool on the counter for about 30 minutes until it's completely set and firm. Don't refrigerate it yet — you want the treats to firm up at room temperature first so they don't get rubbery. Mine always sticks a little to the pan at the edges and that's totally fine.
- Cut into 12 equal squares using a sharp knife dipped in water between cuts. Dip your knife each time so the marshmallow doesn't stick and tear up your treats. Store them in an airtight container, and they'll stay fresh for up to 5 days.