
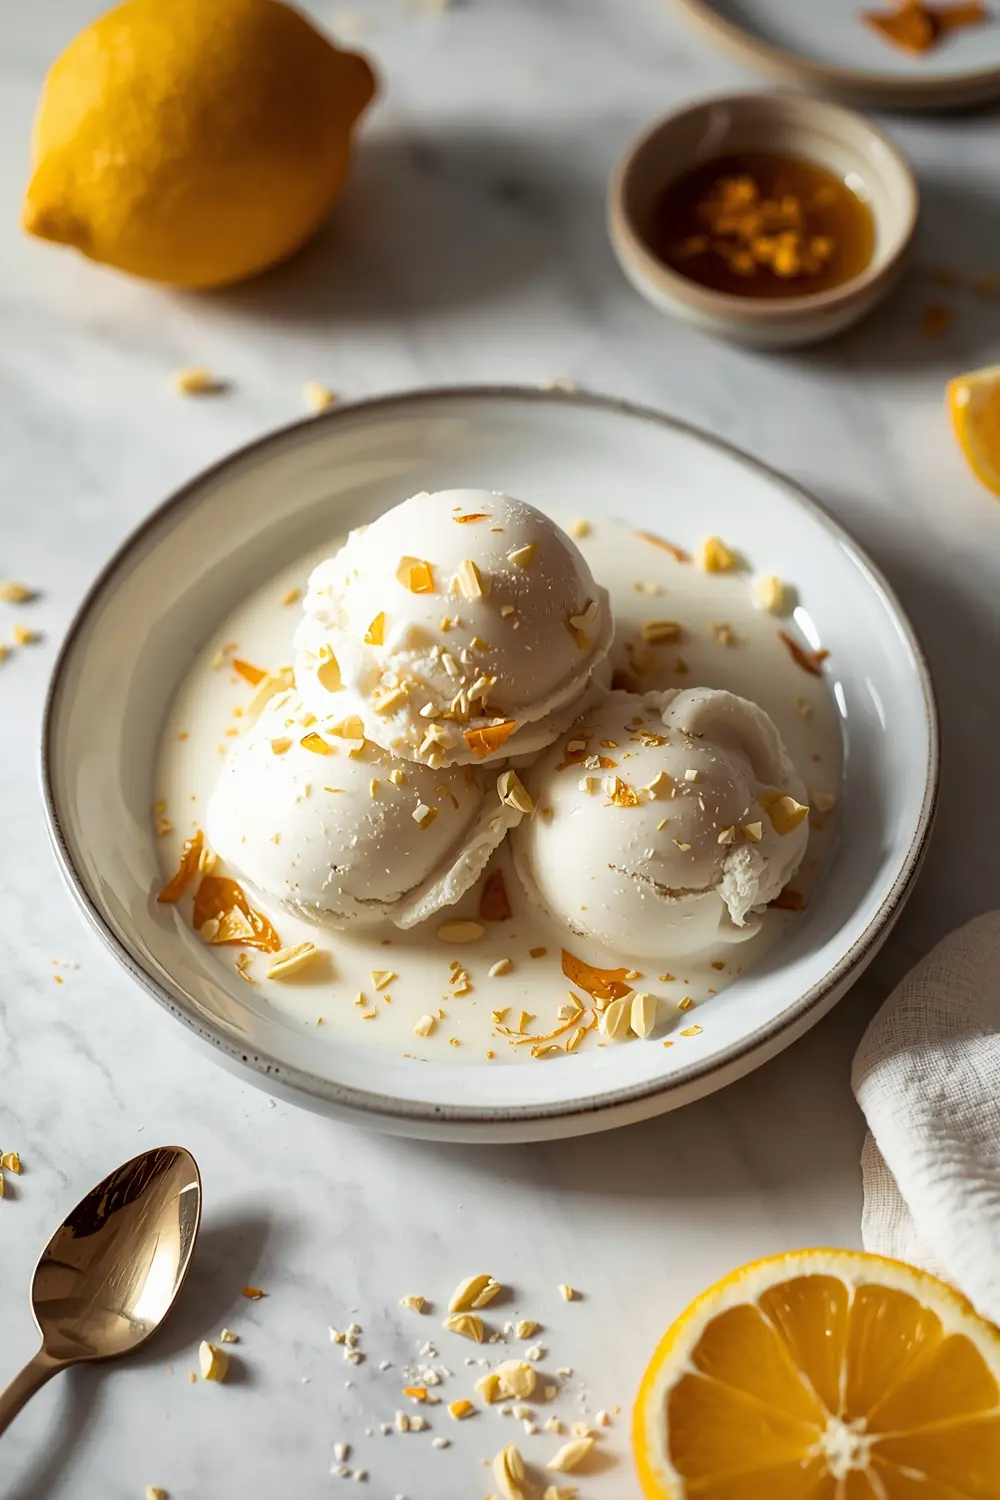
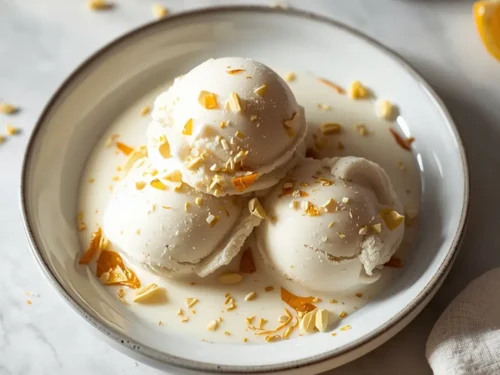
Ever stood in front of your freezer on a summer afternoon wishing you had homemade ice cream without hauling out the ice cream maker? That’s exactly why I created this vanilla bean ice cream no churn recipe—pure creamy bliss with zero machines needed.
The best part? You’ll have genuine scoopable ice cream in about six hours, and most of that is just freezing time. I’m talking hands-on time of barely fifteen minutes.
This recipe is perfect for last-minute entertaining or those nights when you deserve something special. Pin this for meal prep day because it makes enough for a crowd.
If you’re planning a dessert spread, pair this with our strawberry shortcake recipe easy for the ultimate summer entertaining combo that’ll have everyone asking for seconds.
Why this vanilla bean ice cream no churn works
Want to know why this no-machine vanilla bean ice cream no churn beats store-bought? The condensed milk does the heavy lifting—it acts like a churning machine would, keeping ice crystals tiny so you get that silky texture.
I first made this on a July afternoon when my ice cream maker broke, and honestly, I never looked back. The real vanilla bean flecks make it taste like something from an upscale dessert shop.
- Requires zero equipment—just a mixer and your freezer does the work
- Ready in 6 hours—way faster than traditional churned versions
- Real vanilla bean flavor—those tiny black specks are the real deal
- Feeds a crowd—makes 10 generous servings for summer entertaining
| Prep Time | Cook Time | Calories | Servings | Cuisine |
|---|---|---|---|---|
| 15 minutes | 6 hours | 385 per serving | 10 servings | American |
Ingredients for vanilla bean ice cream no churn
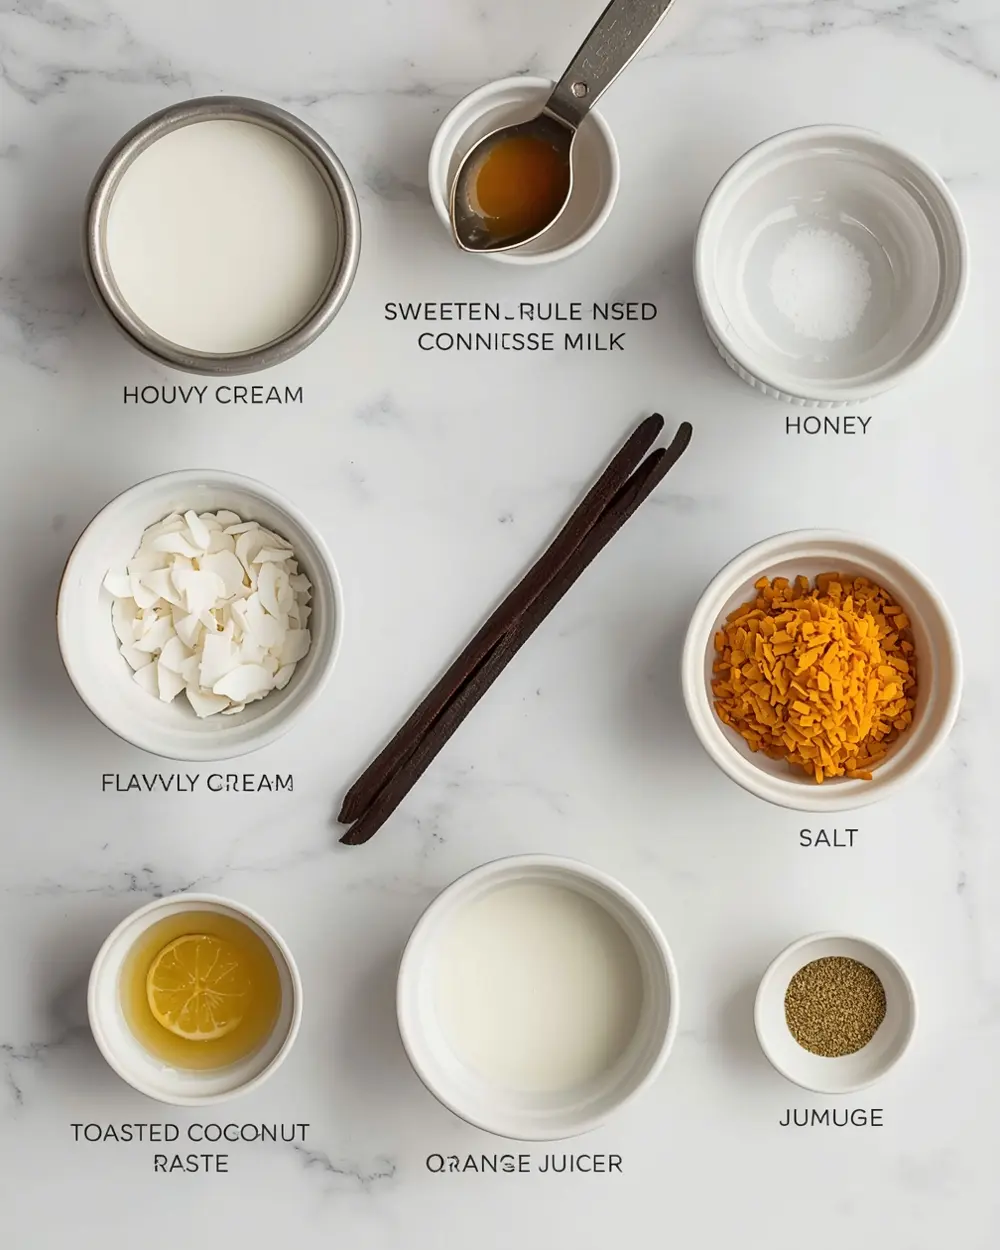
- 2 cups heavy cream
- 1 (14 oz) can sweetened condensed milk
- 1 vanilla bean, seeds scraped
- 1 tbsp honey
- 1/4 tsp salt
- 1 tsp vanilla bean paste
- 1 cup whole milk
- 2 tbsp toasted coconut flakes
- 1/2 tsp ground cardamom
- 1 tbsp lemon juice
- 1 tsp orange zest
Don’t panic if you can’t find fresh vanilla bean—the vanilla bean paste combined with condensed milk still gives you authentic flavor in this vanilla bean ice cream no churn recipe. Honestly, the paste works beautifully on its own if that’s what you have on hand.
For the coconut flakes and cardamom, these add a subtle complexity that makes people ask what’s different about your ice cream. Skip the cardamom if you want pure vanilla, but trust me, the hint of warmth is so good.
Step-by-step instructions
1. Pour your heavy cream into a large mixing bowl and beat it on medium-high speed until soft peaks form, about 2-3 minutes. You’re looking for that cloud-like texture where the peaks gently fold over when you lift the beaters. Don’t walk away—I accidentally over-whipped mine once and ended up with sweet butter instead of whipped cream (lesson learned the hard way).
2. In another bowl, combine the sweetened condensed milk, scraped vanilla bean seeds, honey, and salt. Whisk until completely smooth and the vanilla bean specks are evenly distributed throughout. This is your flavor foundation, so take 30 seconds here to really mix it well.
3. Gently fold the condensed milk mixture into your whipped cream using a rubber spatula. Do this slowly and carefully—you want to keep all that beautiful air in the whipped cream, so use a folding motion rather than stirring. It’ll take about 10-12 folds to fully combine.
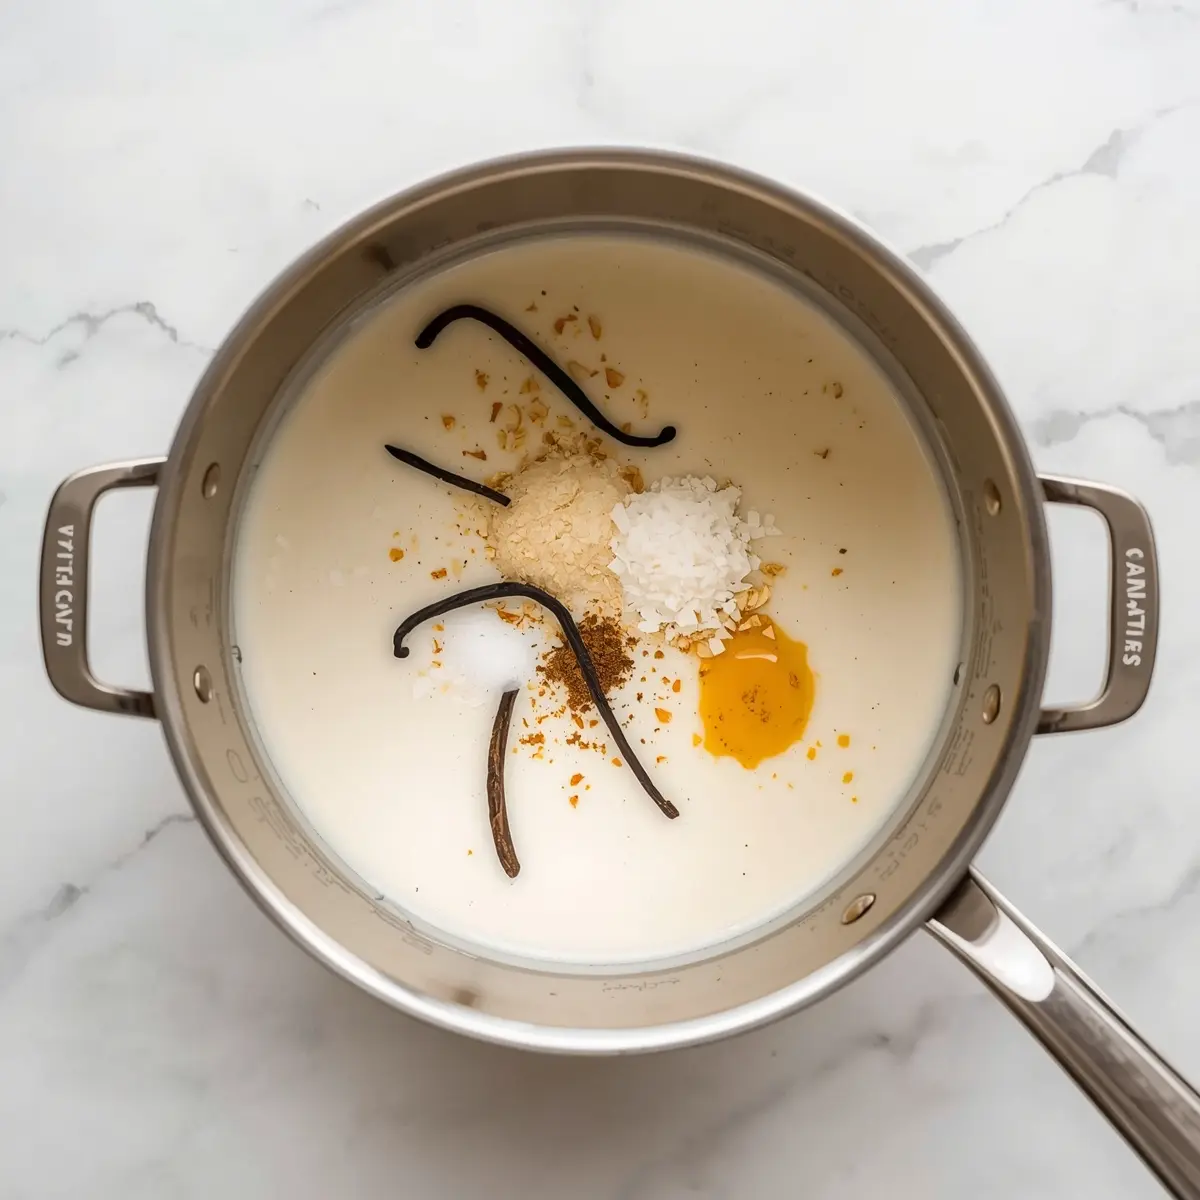
4. Stir together the vanilla bean paste, whole milk, toasted coconut flakes, cardamom, lemon juice, and orange zest in a small bowl. Pour this mixture into your ice cream base and fold it in gently until the flakes and zest are evenly scattered throughout. The citrus adds brightness that balances the sweetness perfectly.
5. Pour your vanilla bean ice cream no churn mixture into a 9-by-13-inch baking dish (or any freezer-safe container you have). Smooth the top with your spatula, then cover it tightly with plastic wrap or a lid to prevent ice crystals from forming. This is crucial—don’t skip it.
6. Pop the container into your freezer and let it sit undisturbed for at least 6 hours, though overnight is even better. You’ll know it’s ready when it’s firm but still slightly soft enough to scoop easily. If you freeze it longer than 12 hours, let it sit on the counter for 5 minutes before scooping.
7. Scoop into bowls and serve immediately, or store it in an airtight container for up to 2 weeks (though it’ll probably disappear way faster than that). The longer it sits in the freezer, the harder it becomes, so pulling it out 5 minutes before serving gives you the perfect scoopable texture.
Serving ideas for vanilla bean ice cream no churn
Top this creamy homemade classic with your favorite accompaniments and toppings.
Over Warm Berry Compote
Spoon your vanilla bean ice cream no churn over warm homemade berry compote for that amazing hot-and-cold contrast. The vanilla flavor shines brightest when it melts into the tart berry juices, and honestly, it’s restaurant-quality simple.With Lemon Curd and Shortcake
Layer this ice cream with our lemon curd recipe easy and buttery shortcake for an elegant no-bake entertaining dessert. The tartness of the curd cuts through the sweetness perfectly while the ice cream keeps everything cool.Alongside Grilled Fruit
Grill peaches or pineapple until they’re caramelized, then serve warm with a generous scoop on top. The charred edges on the fruit create this incredible depth that pairs beautifully with the vanilla bean flavor.Pro tips for perfect vanilla bean ice cream no churn
Storage tips
– Keep it in an airtight container to prevent ice crystals and freezer burn – Store for up to 2 weeks, though flavor peaks within the first 10 days – Label with the date so you don’t forget when you made itMake-ahead instructions
– Prepare through step 5 up to 2 days before serving – You can freeze it solid and scoop directly before guests arrive – Thaw for 5 minutes at room temperature if it’s frozen rock-hardVariations
– Swap coconut flakes for toasted nuts like pecans or almonds – Add 1/2 cup crushed cookies for a cookies-and-cream version – Try almond extract instead of vanilla bean paste for a different flavor profileTroubleshooting
– If it’s too icy, you likely over-froze it—thaw 10 minutes before scooping – If it won’t hold its shape, your whipped cream wasn’t stiff enough—start over with fresh cream – If it tastes watered down, the condensed milk wasn’t mixed thoroughly with other ingredientsFrequently asked questions
How long does vanilla bean ice cream no churn last in the freezer?
It’ll stay fresh for up to 2 weeks in an airtight container, though the flavor and texture are absolute peak quality within the first 10 days. After that, it starts developing ice crystals and loses that silky creaminess you worked for. I’ve found that marking the container with a date helps me remember when I made it.
Can I make this without real vanilla bean?
Absolutely—use 2 teaspoons of vanilla bean paste or regular vanilla extract instead. The vanilla bean paste gives you those pretty specks and richer flavor, but extract works perfectly fine too. Some people say you can’t tell the difference, but I personally prefer the depth the bean brings.
What if my whipped cream turned into butter?
Don’t stress—just grab fresh heavy cream and beat it again, but watch it more carefully this time. Stop as soon as soft peaks form and you see that cloud-like texture. Over-whipping happens faster than you’d think, especially if your mixing bowl gets warm.
Can I use this recipe to make cookie dough or other flavored ice cream?
Totally—this base recipe works for endless variations, so experiment away. Try folding in crushed cookie dough bites or other mix-ins right before freezing. Just keep everything cold and fold gently to maintain that airy texture.
Final thoughts
This vanilla bean ice cream no churn recipe proves that you don’t need fancy equipment to make restaurant-quality desserts at home. The condensed milk is honestly the secret weapon that makes this work without any machines.
I’ve made this dozens of times now—for Fourth of July cookouts, surprise desserts, and late-night ice cream cravings—and it never disappoints. Your friends will think you spent hours in the kitchen when really you invested just fifteen minutes.
Save this recipe for summer entertaining, and don’t be surprised when people ask you for the secret. You’ll smile knowing it’s actually super simple and totally foolproof.
Ready to become the dessert person at your next gathering? Start with this classic version, then explore the endless flavor possibilities once you master the base.
Liz’s Classic No-Churn Vanilla Bean Ice Cream for Summer Entertaining
Ingredients
Method
- Pour your heavy cream into a large mixing bowl and beat it on medium-high speed until soft peaks form, about 2-3 minutes. You’re looking for that cloud-like texture where the peaks gently fold over when you lift the beaters. Don’t walk away—I accidentally over-whipped mine once and ended up with sweet butter instead of whipped cream (lesson learned the hard way).
- In another bowl, combine the sweetened condensed milk, scraped vanilla bean seeds, honey, and salt. Whisk until completely smooth and the vanilla bean specks are evenly distributed throughout. This is your flavor foundation, so take 30 seconds here to really mix it well.
- Gently fold the condensed milk mixture into your whipped cream using a rubber spatula. Do this slowly and carefully—you want to keep all that beautiful air in the whipped cream, so use a folding motion rather than stirring. It’ll take about 10-12 folds to fully combine.
- Stir together the vanilla bean paste, whole milk, toasted coconut flakes, cardamom, lemon juice, and orange zest in a small bowl. Pour this mixture into your ice cream base and fold it in gently until the flakes and zest are evenly scattered throughout. The citrus adds brightness that balances the sweetness perfectly.
- Pour your vanilla bean ice cream no churn mixture into a 9-by-13-inch baking dish (or any freezer-safe container you have). Smooth the top with your spatula, then cover it tightly with plastic wrap or a lid to prevent ice crystals from forming. This is crucial—don’t skip it.
- Pop the container into your freezer and let it sit undisturbed for at least 6 hours, though overnight is even better. You’ll know it’s ready when it’s firm but still slightly soft enough to scoop easily. If you freeze it longer than 12 hours, let it sit on the counter for 5 minutes before scooping.
- Scoop into bowls and serve immediately, or store it in an airtight container for up to 2 weeks (though it’ll probably disappear way faster than that). The longer it sits in the freezer, the harder it becomes, so pulling it out 5 minutes before serving gives you the perfect scoopable texture.


")